

Repairing an Antique Doll part 5
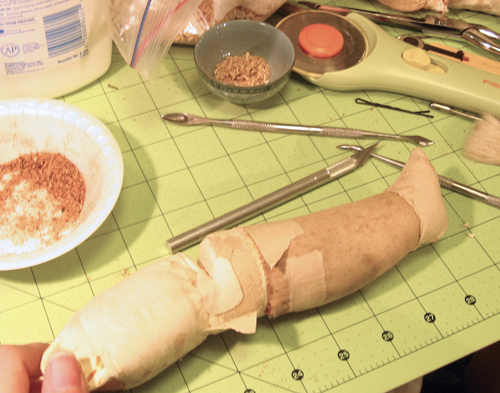
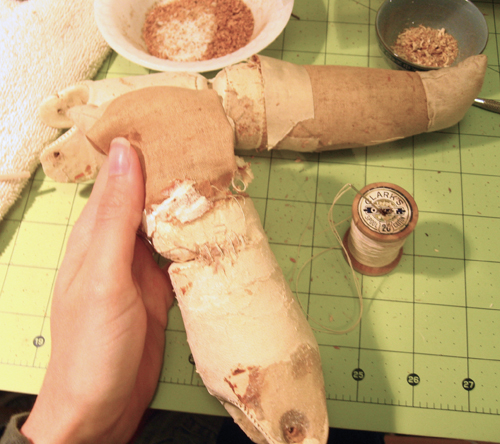
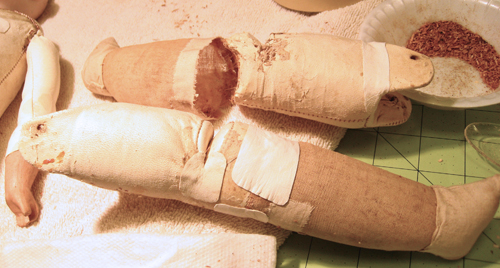
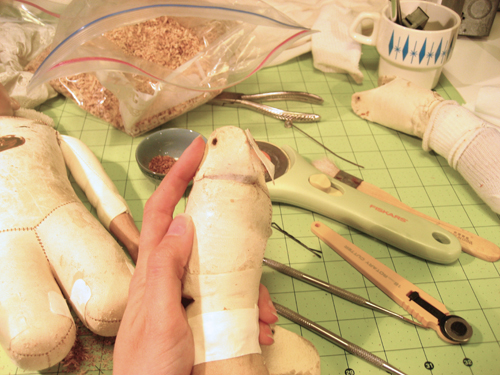
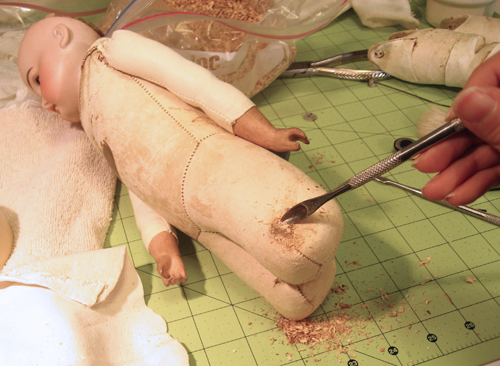
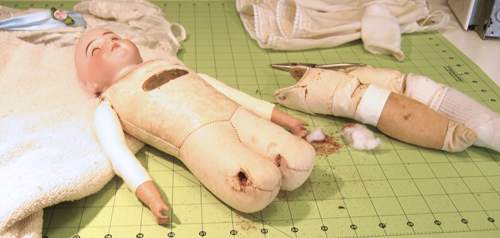
There was one tear in the fabric which I covered with a patch of old muslin. In order to keep the loss of sawdust to a minimum, I wrapped a piece of masking tape around her leg after removing all of the prior doctor’s leather. The work that’d been done was so horribly sloppy and leaky, it was really sad and surprising that the doll hadn’t lost even more sawdust. I picked the least shredded knee joint and began my patching there by making a rectangle and then splitting it for where the gusset opens up.
Then I did the same to the other side.
And promptly took a break from working on that leg. That way my work stays fresh and I don’t get quite as frustrated. (I switch gears a lot while I work. It seems like I’m scatter-brained–and maybe I am!–but it allows me to keep working even when the going gets tougher and tougher.)
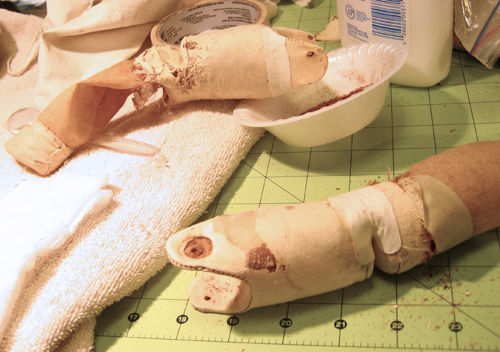
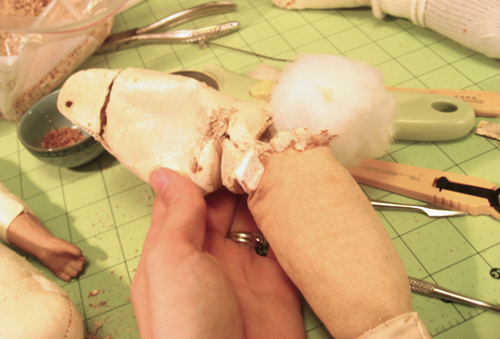
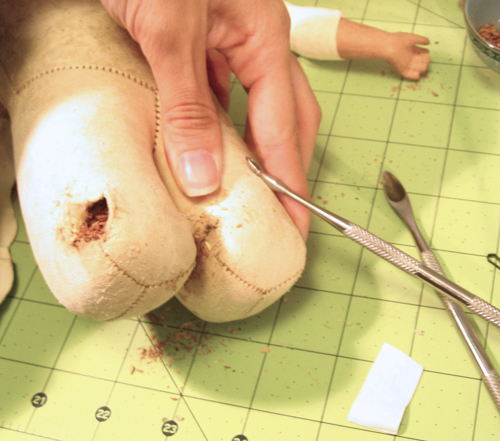
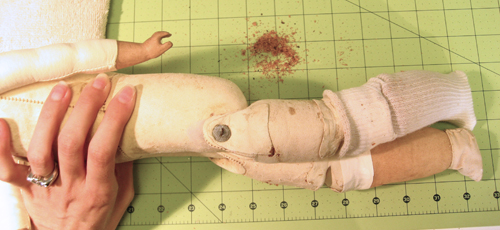
The other side had a gaping hole so I got out my old spool of white thread. It’s not really white anymore, but that’s what makes it perfect because the doll’s body is aged as well. I did my best to gather up what leather was still there. I think I was the third seamstress to have worked on the knee, too.
Just like the other leg, I patched this one up, too…
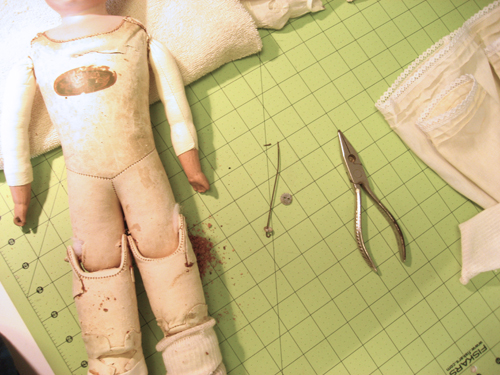
…And then set it aside because I just didn’t think I had it in me to start stuffing the whole thing with sawdust yet. I’ve stuffed arms before, but never a whole leg. I didn’t really know what I was in for and didn’t want to find out yet, either. Again, I gave myself a break and worked on the other leg.
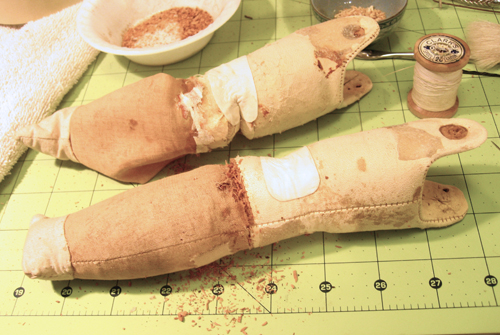
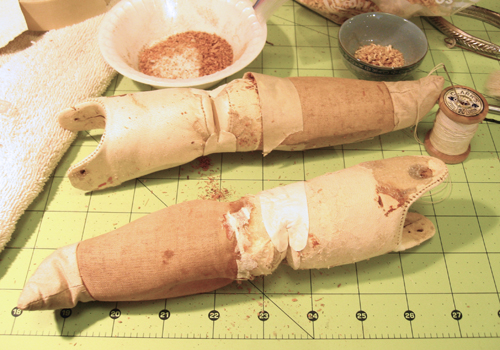
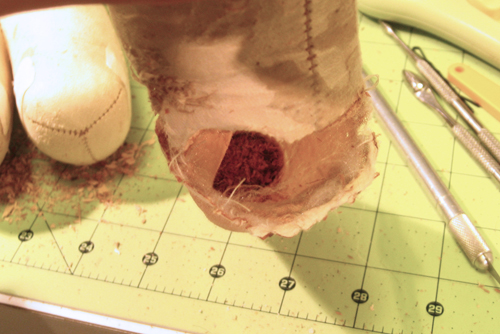
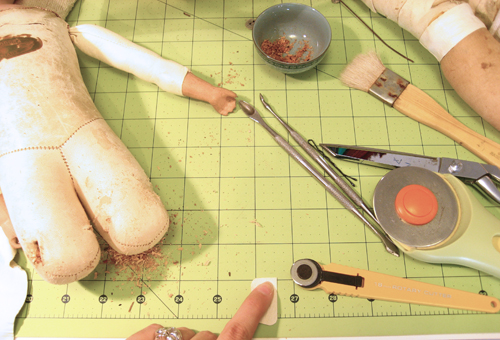
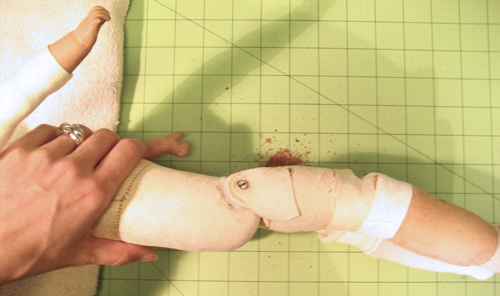
It was pretty straight forward except that I’d need a very long piece of leather so that I could wrap it all the way around. The catch was that I couldn’t stuff the leg, wrap it and be done. I had to do it in stages so that I could give the leg the right firmness with packed sawdust. The tear went almost all the way around.
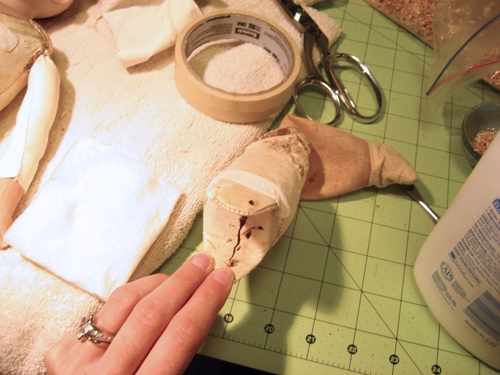
With a lot of patience, I got the leg all fixed up and read to be reinstalled. The other leg…well…I’ll tackle that in my next post.
My Shoe Chronicles — Paisley Suede Ankle Boots
I wore these to my first serious job interview and got the job. They’ve been good luck ever since.
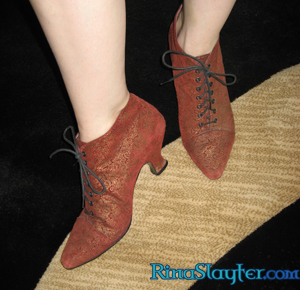
Sometimes I forget I have these. I don’t have a lot of outfits that really go with them, but of course that doesn’t stop me from wearing them. They sat innocently on a rack at a thrift store I’ve long since forgotten. Along with all the usual second hand shoes, these were easy to spot.
My husband jokes that the easiest way to figure out what to get for me is to find the ugliest thing in the store and buy it because I’ll love it. In fact, my brother just used that principle when deciding which slipper socks to get me for Christmas. As he stood there in front of all the choices, he said he picked the most boring ones for my mom and the loudest, silliest ones for me. Score!
Repairing an Antique Doll part 4
Having completed the doll’s torso, it was time to work on the legs. Since the leather patches on her hips were already starting to lift, I peeled them all the way off…
And couldn’t figure out why they’d been put on in the first place. They were huge and appeared to only be for the section around the metal buttons on the ends of the hip wire. Yeah, there was damage, but only in the shape of the circle under the button and had worn through the patches, too.
Ironically, on the inside of one of the legs, the leather had a tear which would’ve been prevented had the person who’d done the outside also done the inside.
As I inspected it, I squeezed the leg. It was lighter than the other one and didn’t feel right. Grrr… the whole thing had been stuffed with polyester fiberfill!!!!!
Well, the whole thing except the foot.
I pulled out all the fiberfill and threw it away so I wouldn’t have to look at it. Then, I set about repairing the upper tear. It was the easiest of all the leg damage so I got that out of the way.
And while I was at it, I noticed another tear on her torso so I took care of that one as well.
Okay, so I was actually procrastinating. I was actually dreading the knee repairs. I did absolutely everything else I could do before I embarked upon all the work to be done to those legs. One needed to be completely restuffed with sawdust. They both were shredded at the knee and just below where the fabric met the leather. Those legs were a wreck, but they weren’t beyond repair.
Pics of my Cars
It has been awhile since last I posted anything about my car collection. I’ve been a little too busy to work on them, but thankfully they’re all running at the moment. Sure, some need a little tuning, but as long as I can get to the grocery store and back, I’m not worried. They’re never-ending projects. Driving them *should* be an adventure. (Like the time my ’68 Mustang fastback caught on fire on the way to the grocery store. Yeah, that was fun! No major damage. I only had to replace a couple wires under the dash.)
Speaking of my ’68 Mustang fastback…my pride and joy…
She was born a plain jane, but I assure you, she’s never been plain during the 15 years I’ve owned her. She always keeps me on my toes and will always be with me.

The ’83 Trans Am in the previous pic used to be mine as well. Had to sell it, but I don’t really miss it that much. It was a nifty neat car and I wish I could’ve kept it, but I’m glad to’ve owned it for a time and gotten to drive it in a few television shows.

Notice the difference in engine compartment between the previous pic and the following one? The one below was taken in 1998… A few things have changed during that time, huh? And more have changed since that pic, too!


’66 Corvette convertible… Yes, that’s a 427/435 under that hood. I’ll admit that this is more Jason’s car than mine, but I do tinker on it from time to time and of course, I do drive it. Yes, it’s a very loud beast. I’ve even used it in a few television shows and feature films.


What can I say, I like ’68 Mustangs. Here’s my Convertible cruiser. He’s not fast, but he sure does look and drive great. Finally got an AOD in him, too, after the engine swap I covered in the car section of this blog.


I told my hubby I was gonna do ‘a little tinkering on the car’. He came out and this is what he found!

Here’s my project car–’69 Corvette–when we bought it. Finding it, involved my best friend Eddie (he helped with the last engine swap) and a pair of binoculars…over a period of about 15 years.


When Eddie and Jason lifted the hood, this is what they found. Nice, huh? Just start ‘er up. NOT!

Eddie and I particularly enjoyed this detail… Yeah, that’s a wasp nest on that rotor… I saved it, too, just ‘cuz I’m weird like that.

My ’03 Viper is quite a fun ride…


Last, but certainly not least, my ’00 Prowler… (I really need to take more pics of it, but this pic is good enough.) Really, really fun to drive.

I also have an ’08 Saturn Sky Redline, but I haven’t taken any pics of it yet.
My Shoe Chronicles — Black Funky Boots
I’d never seen another pair of shoes quite this odd yet simple. I’ve got a few wild pairs, but this one, well, this one threw me for a loop. They’re simple black, but shaped so strangely I had to have them.
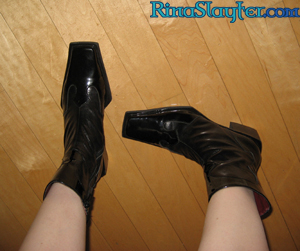
When I first saw them at at Goodwill while on vacation in my hometown, I almost didn’t buy them. They were almost a little too strange. Yeah, that’s strange in itself: the fact that I wouldn’t get a pair of shoes because they were too weird. But that’s one of the reasons I knew I had to get them. They were my size, weird and $10 or less, therefore I must own them.
And, y’know, they’re just right for spunking up a boring outfit. The picture doesn’t really do them justice. I’ve never seen another pair quite like them. I get stopped by complete strangers asking where in the world I got them. I have no idea what year they are from, either. I suppose they’re timeless!
Repairing an Antique Doll part 3
To fix the hips, I stuffed more sawdust in…until it was fully packed and would hold no more. Also, I started on the inside where the holes were smaller.
Using an old ruined pair of kid leather gloves, I cut off a rectangle and then rounded the corners so that they wouldn’t catch on anything.
Using white glue, I smeared the whole back side of the patch and then applied it to the doll.
And did the same for the outside…although that took a lot longer. So much so that I took a few breaks because I was getting horribly impatient.
Sure, stuffing sawdust is easy, but back in the day, these dolls were packed so tight they were solid. If I’m going to repair a doll, I have to follow that same standard. That’s what she deserves. So I stuffed and stuffed and stuffed and stuffed and packed and stuffed until her hips were packed and then I patched them up.
My Shoe Chronicles — Olive Leather
I’ve gotten more compliments on these shoes than many others in my collection and I don’t know why. Maybe it’s that they look as comfy as they feel and they’re a little odd. I really don’t know, but I love ’em!
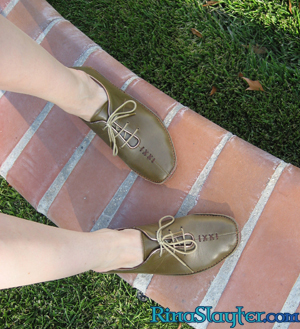
They’re also a unique color for my wardrobe. I don’t have any other pairs in this shade or shades near them. They’re one of very few pairs that I bought new simply for that reason: I don’t have another pair like them.
It’s uncommon for me to buy anything new. It’s gotta be truly unique and awfully cheap. The way I see it is that if I can go to a thrift store and buy four pairs or more for the price of those shoes, they better be totally awesome! In the case of these, I think they were somewhere around $25 in a quirky little shoe store in Chinatown of all places. It was definitely money well spent.
Repairing an Antique Doll part 2
For the record, I’m not a doll doctor. Not at all. I’ve never watched someone else repair a doll. I’ve never even asked someone about doing it. I’ve read a couple of books on the subject, but that’s it. Everything I know about doll repair is from what I’ve done and what I’ve seen on the dolls as they come into my collection. I could be totally off my rocker on how I work on them, but I care immensely. I once overheard an old school mechanic tell a young man that “What you lack in experience, you make up for in caring.” I like to think that rings true here, too.
I’ve blogged some of my doll repair work previously, too. Click here to read about the celluloid doll I fixed.
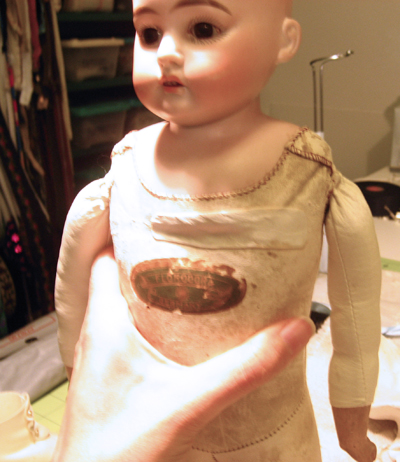
All right, continuing on my AM 1897…
I wasn’t offended by the double-stick tape under the wig. I don’t use it, but that’s just because my dolls don’t get moved around and their hair stays on just fine without the need for anything sticky to keep it there. The only thing that bothers me about double-stick tape is that it does dry out and become ineffective. This stuff was still super-gooey, though.
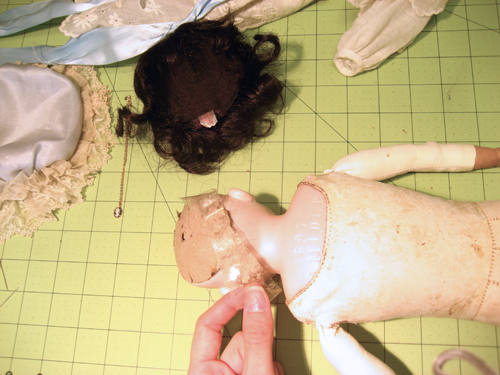
However, I am offended by synthetic wigs on antique dolls. When I get a chance, I’ll swap this doll’s synthetic wig for either a human hair one or perhaps one made from mohair. I’m leaning more toward human hair because that’ll look the closest to how the doll came into my collection and still be correct for the time period.
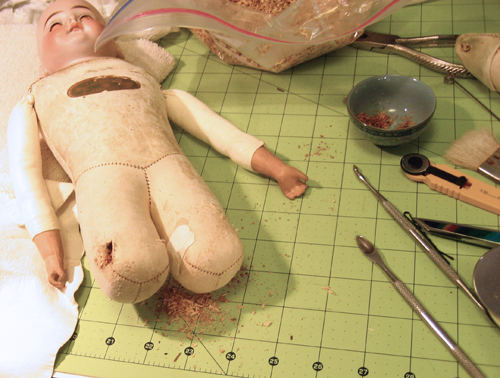
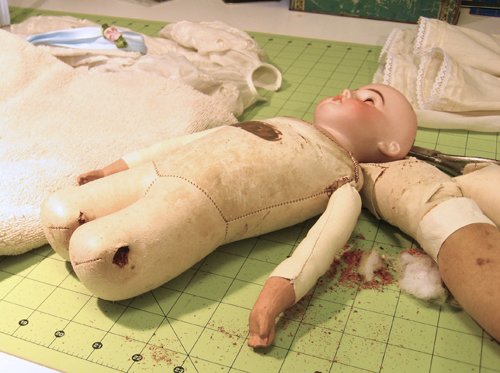
Okay, here I am looking at the task at hand. Both legs need work below the knee. The leather on one side was marginal.
The leather on the other side…well…it was very loose under the sock.
Okay, time to dig in for real. Since I needed to work on the hips and the legs themselves, I figured the best thing to do would be to remove the legs first. I straightened the end of the wire (which went through the right kind of metal buttons at each hip, but they were mismatched in size) and removed it.
Only to discover that the hip damage on the torso was even worse than I’d thought. That hole is huge.
And the hole on the other side is even bigger…and stuffed with polyester fiberfill…grrrrrr…
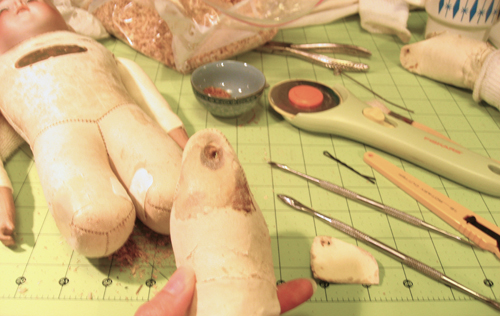
Time to get out the bag of sawdust I keep handy… and the old kid leather gloves to use as patching.
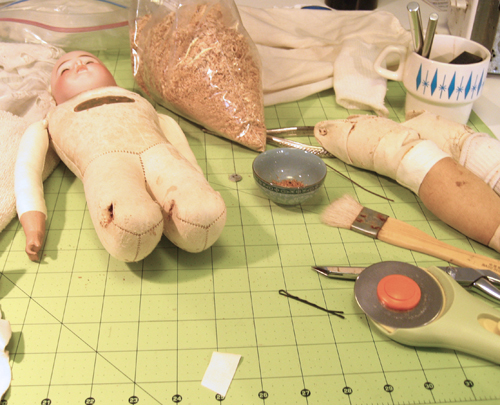
In my next post, I’ll detail how I did the hip repair.
Contest! Handmade Prizes!
 So, I’ve mentioned time and time again that I also write romance novels as half of the Ashleigh Raine writing team. Our next book is coming out in April and we wanted to do a contest/giveaway in celebration. Whenever we decide to do a contest, the next question is always what will the prizes be.
We both had a ‘like duh’ moment. My handmade stuff would be perfect. It’s all 100% original, unique and will never be duplicated, so why not? Plus, since our next novel is Forsaken Talisman, book two of our Talisman Bay series and in that series Twyla Emerson is a bead-oholic (gee, where’d we get that inspiration? Hmmm…?) it makes sense that the prizes are from as close to Talisman Bay as anyone can get.
So, if you’d like a chance to win one of seven different prizes, head on over to the Contest page at AshleighRaine.com for complete details.
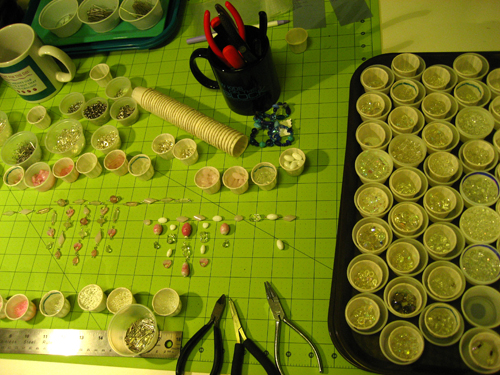
In the mean time, I’m going to immerse back into Twyla’s “damn bead room”–as she so affectionately calls it–and have her help me make some more Twilight’s Fancy necklaces. Good luck on your contest entry!
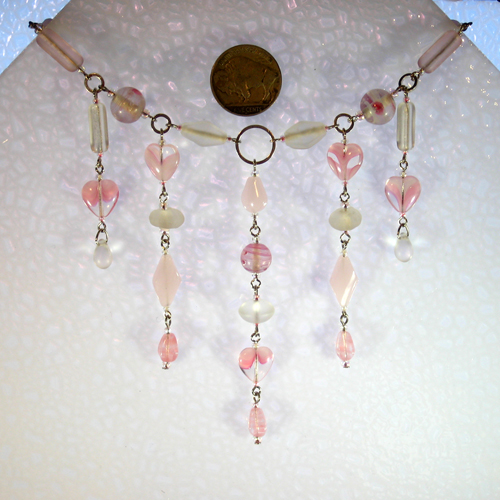
Blissful
When I began designing this necklace, I got a little interrupted for a great reason: Inspiration.
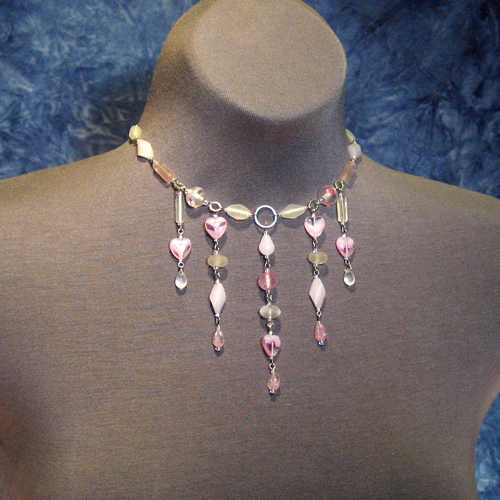
I haven’t listed the other necklace just yet, so look for it within the coming weeks, but as I was working, I saw some beads in my collection and thought they wouldn’t work for the necklace I was working on, but they’d be great in their own. And when inspiration happens, I run with it!

So this was the first time in years that I worked on two necklaces concurrently. It seemed like I’d place a bead on one and then place a few on the other. I just kept on going because both necklaces seemed to be playing off of each other. Like, one could not have happened without the other even though they don’t rely on the same beads.
I don’t know if this will be a common occurrence, but I most certainly welcome it if it happens again! I already love designing and building Twilight’s Fancy necklaces, but when they come together the ways these two did, it’s like opening a whole new world for me in a way because I didn’t know it was possible.
I’ve designed more than one necklace at the same time, but never quite like this. The others came together more linear, one after the other with only a few beads overlap. These were together. I’d laid out a few beads on one and then a few on the other and they both finished at the same time. I actually had to pay attention that I didn’t mix the two up when I assembled them!
Or perhaps the following three would interest you:


 RSS Feed