

My Shoe Chronicles — Flower Boots
I saw these in the little boys department and saved a fortune on a great pair of boots. Who says only kids can have fun boots?
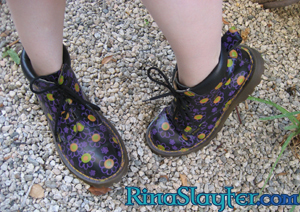
Yeah, little boys section. Had they been in the adult section, they probably would’ve been twice the price. They’re Doc Martens, too. I got them about 12 years ago now and they’re finally broken in. Docs always take awhile to wear in, but when they do, they’re some of the most comfortable boots on the planet.
And most durable, too. Well, the ones made in England at least. My husband got a pair of Docs that were made in China and they fell apart within a few months of hard wearing.
Over the years, I’ve collected eight pairs (2 pairs of shoes, 6 pairs of boots) from thrift stores and two pairs that were purchased new. Look for “Made in England”. They’ll last a lifetime.
My First Big Show
I’m not saying that my booth was big, but that there were a lot of booths and people cruising around at the Rose Bowl Flea market. I enlisted the help of a couple of my friends and they got to take in the flea market for the day because I was totally able to hold down the fort solo.
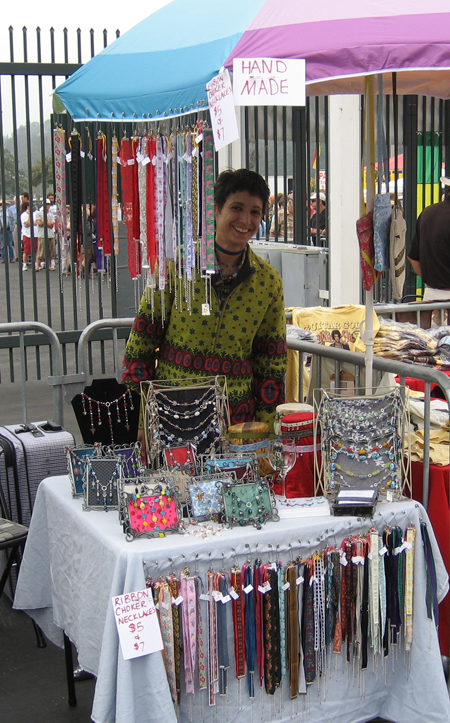
This is like a new chapter in my life. I’ve gone to many flea markets and craft fairs, but I’d never had a booth at one. And, well, here I am.
And I don’t think I can get enough. It’s lots of fun to meet people, too, so look for me doing many more of these shows in the future. I cart all of my handmade inventory out to these things, so if there’s something you’ve seen in my shop at ArtFire or Etsy, and want to see in person, come see me at a show if you’re in the LA area. I’ll announce which shows I’m doing when, of course, so please check back or subscribe to my RSS feed.
I also bring new stuff to the shows that hasn’t been posted to either of my shops yet. (I figure that if I sell it at a show, then I need not photograph it, etc.!) At the Rose Bowl, I had several new Rina necklaces, ribbon chokers without beads and new embroidered ones, too.
How To Make A Ribbon Choker Necklace — Part 2
UPDATE: For a better tutorial, visit ribbonchoker.com.
This is where it all starts to come together. Remember, there are plenty of other ways to make a ribbon choker necklace, I’m only presenting the way I do it.
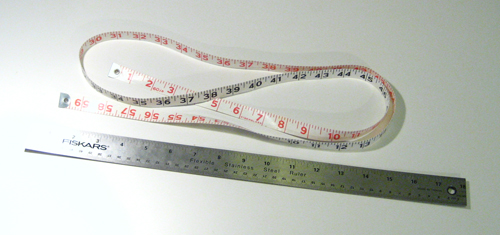
Step three: MEASURE AND CUT!
There are a few ways to figure out the length of ribbon you’ll need. It’s always a good idea to measure the neck you’re about to make the necklace for just so you’ll have a number to reference later.
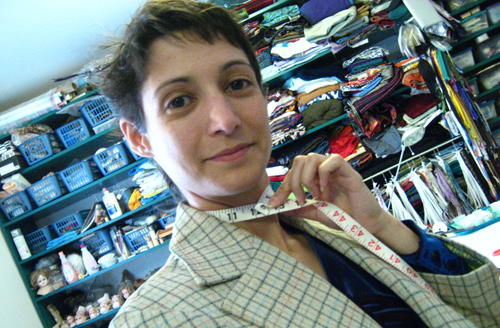
Yes, I have a very small neck.
Using a measuring tape is easiest. If you don’t have a measuring tape, you can also run a string, ribbon, shoelace, whatever around the neck, pinch your fingers over the spot where the end meets the rest and then measure that length with a ruler.
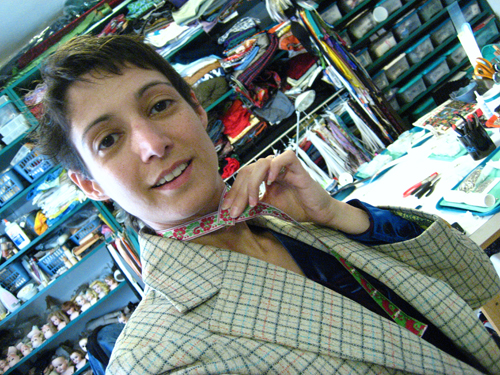
No matter which method you use, subtract a little more than an inch. If you’re not using an extension chain, you might want to subtract only 3/4 of an inch. I like to subtract at least an inch. That way I’ve got more room to adjust not only how tight the necklace is, but where it’ll land on my neck. I can wear it tighter which’ll make it sit higher or looser which will make it lower on my neck.
Sometimes the wider ribbons will need to be a little shorter because they’ll end up sort of conical around your neck rather than perfectly cylindrical. You’ll definitely want some room for adjustment on those.
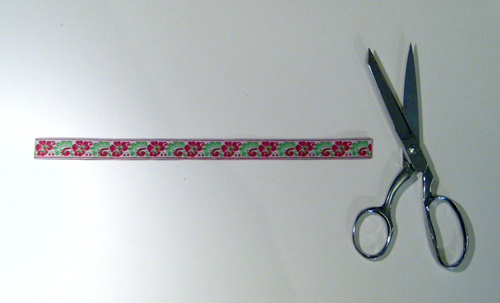
No matter what the length of your ribbon, make your cut perfectly straight across perpendicular to the length of your ribbon. If the ribbon wants to fray, cut the fuzz away, too. You want good, solid ribbon inside the clamp.
There are anti-fray products as well as glue that you can use, but it’s not necessary unless you’re working with a particularly thin and finicky ribbon that would rather fray than cooperate. If that’s the case, the ends will need to be treated or even folded and sewn.
I haven’t needed to take any drastic measures other than a dot of fabric glue to hold down the thread on the back of some of my beaded and/or sequined ribbons. I just don’t want them to unravel and all I do is load the tip of a toothpick with fabric glue, touch it to the thread and push it down to the back of the ribbon at the very edge so that it’ll be completely hidden when the clamp goes on.
Step four: PUTTING IT TOGETHER!
Choose the right clamp to fit your ribbon.
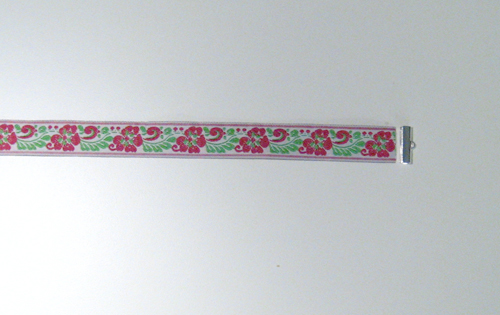
I was lucky in that the clamp and the ribbon match in size. On my wider ribbons, I have to iron the corners down and cut a new edge in order to match the thinner clamps.
Still with me? Now we’re really turning this bit of ribbon into a pretty necklace.
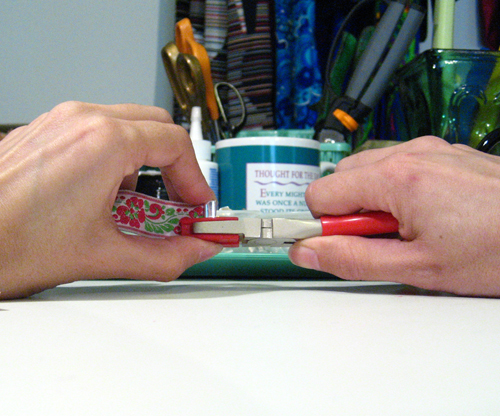
Put the clamp in the pliers. (Sorry about my photography. I did this whole series by myself and sometimes I really needed a third hand to help out. At least it shows that you don’t need much room in order to put these together.)
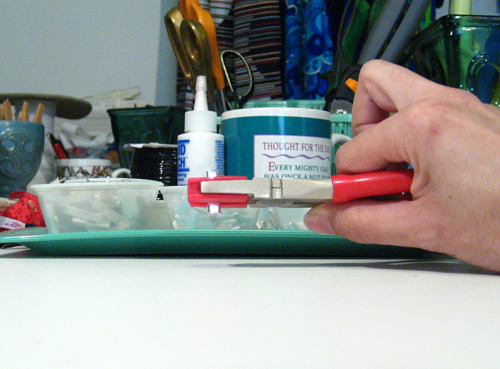
Now for the fun part. I’ve got the clamp in my pliers, ready to compress. I add the ribbon with my other hand, holding it between my thumb and forefinger to keep it centered in the clamp. My other fingers are pushing it into the clamp.
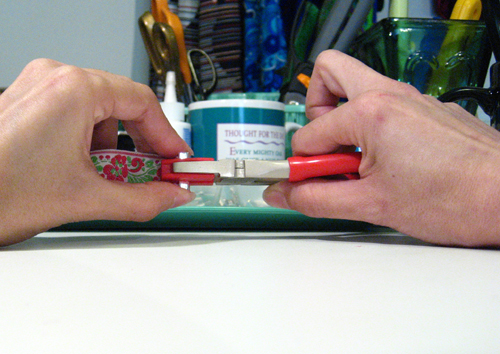
Now smash the clamp closed. I usually get my thumb and forefinger a little stuck. There’s a knack to not hurting them and even after as many as I’ve made, I still get pinched now and then!
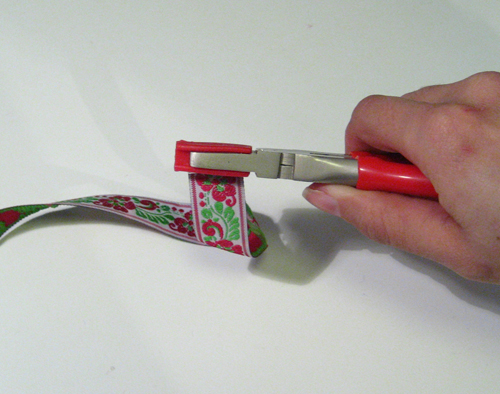
It won’t be closed all the way just by compressing it in the middle. Keep your fingers in place, holding the ribbon or it’ll slide out or go crooked and that won’t look very nice. Move the pliers to the top and squeeze. Then move them to the bottom and squeeze.
For good measure, I like to give two more squeezes along the length of the whole clamp. One on each side just for good measure.
From here, all that’s left is putting on the findings…which I’ll show you how to do next time.
To see more of my work, visit my Etsy Store and my Artfire Store. If you mention my ribbon choker how-to blog series during checkout of any purchase from my shop, I’ll include a free ribbon choker necklace.
My Shoe Chronicles — Aqua Dots
I love these shoes because they’re funky. I saw them and had to have them. They’ve even got stars and chains on them.

Another of the few pairs I bought new. They’re sort of nostalgic for the 80s and go with one of my favorite skirts. Oddly, I’d painted silver diamonds on the skirt to hide a few stains. The next week, I went to my favorite shoe store in Chinatown, and there these were on an end cap.
Yeah, as soon as I saw them, I knew they were leaving with me. My husband just rolled his eyes. He knew it to. In fact, he saw them before I did and then scolded himself for pointing them out to me. He’ll likely never learn not to point out silly shoes to me and I’m so glad!
My Dinosaur
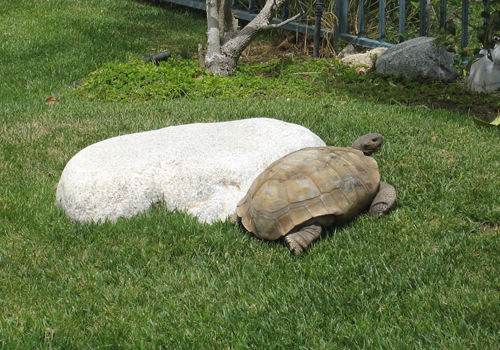
My husband and I always joke that we have a moving boulder in our yard. It seems to crop up in all sorts of different places. This morning, there were two boulders where I only remember having one…
It is so totally Friday and I’m so totally glad for it. Not that my weekend will be laid back in comparison to the week I’ve had, but there’s just something special about Fridays for me.
In celebration, I’m going to go make a bunch more necklaces. Or maybe frolic with my walking boulder…aka Toad. (Yes, my tortoise is named Toad. Thankfully, he’s not smart enough to be confused by it.)
How To Make A Ribbon Choker Necklace — Part 1
UPDATE: For a better tutorial, visit ribbonchoker.com.
I think it’s pretty safe to say that we all know ribbon comes in many different shapes, sizes, colors and in various ways. Sometimes it’s on a spool, sometimes it’s wadded up and shoved in the corner of a box long forgotten, sometimes it’s on cards or wrapped around a gift. My ribbon comes from all sorts of places. Some is old, some is new, some is plentiful, some is just a scrap. But I treasure it all.
In this series of posts, I’m going to show you how to make a ribbon choker necklace. I’m sure there are many other ways of doing it, but this is how I do it and I hope it helps get your creativity flowing in bigger, better ways, too.
Okay, step one: GET RIBBON!

For this series, I’m going to use the flowery ribbon. It suits my personality.
Step two: GET TOOLS!
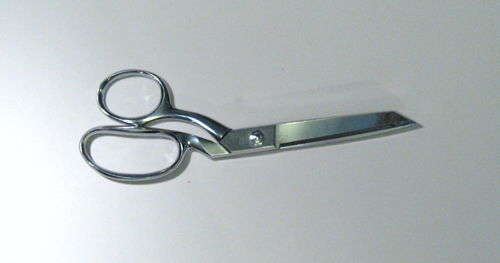
I like to use fabric scissors because a clean, straight cut is very important. Sometimes I use a rotary cutter, but that’s mostly when I’m making several necklaces at once. I lay the ribbon on my cutting mat and do a few long slices rather than cutting each necklace individually.
While it’s possible to make a ribbon choker without having a tape measure or ruler, sometimes they really come in handy. Especially if you don’t always have the neck that you’re making the choker for. If you measure your sister’s neck that first time, write it down so you can make more for her without having to measure…unless she’s still growing. You don’t want her to outgrow your necklaces!
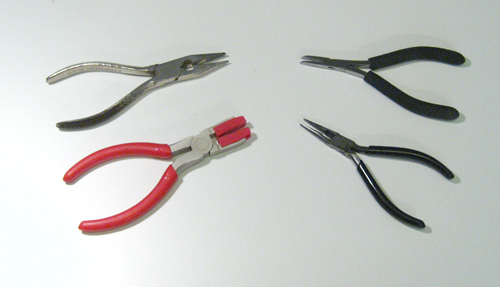
Here’s where things get a little tricky when it comes to tools. Pliers are a necessity, but the type of pliers can vary. I like to use one pair of bent needle nose pliers with a pair of straight needle nose, but you could easily use two straight ones. Basically, you need two pairs of pliers with small tips.
The red pair of pliers was specially designed for bending wire. There are plastic wedges on the nose so that when you bite down on wire, it won’t get scratched. While this pair is not necessary, I highly recommend it so that you won’t scratch up your metal ribbon ends.
Before I got these inexpensive pliers, I actually devised a rather strange way of using two small blocks of wood to smash the ribbon clamps closed. While that method worked and didn’t scratch, it was rather unwieldy. If you’re using textured ribbon clamps, scratches are easier to avoid…or at least they don’t show up as clearly through the design.
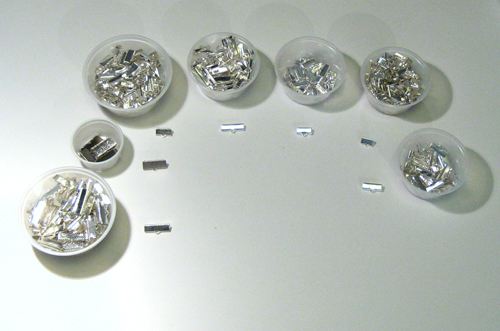
Step three: GET FINDINGS!
Ribbon clamps come in many different sizes. Since I make chokers out of a lot of different sized ribbons, I have an array of clamps which I can use. Some are textured and some are smooth. I’ve seen them sold in multi-packs, too. Basically, you need the one that most closely matches the size of the ribbon you’ve chosen to use. It can be a little bigger, but I don’t recommend going much smaller.
The main thing the clamp does is keep the ribbon from fraying. If the clamp is too small, the edges of the ribbon will start shedding and fraying. A clamp that’s too big just looks a little funny, but I’d rather it looked funny than have the ribbon fall apart.
Finally, you’ll need various necklace findings.
Jump rings, clasps, more jump rings (because I can be obsessive sometimes) and extension chains.
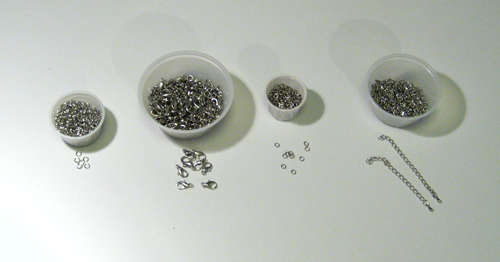
I like to use two different sizes of jump ring, but it honestly doesn’t matter. I’m mostly just trying to use up what I have. I use the extra jump ring to make the clasp line up better.
Clasps are also a thing of personal preference. I like lobster clasps, but any clasp will do.
Extension chains are not necessary, but they sure do help a lot. For instance, if you accidentally made the necklace too small, it’ll still fit perfectly with the extension. Also, an extension chain can facilitate where the necklace sits on your neck whether high or low. They aren’t absolutely necessary, but I highly recommend them.
You can make them out of old necklaces, too. Just cut 2 or 3 inches from a length of chain. If you’re in the mood, add a charm at one end as a nice little personal touch.
Up next will be how to use all these tools and supplies in turning a length of ribbon into a cute little necklace.
To see more of my work, visit my Etsy Store and my Artfire Store. If you mention my ribbon choker how-to blog series during checkout of any purchase from my shop, I’ll include a free ribbon choker necklace.
My Shoe Chronicles — Red Keds
I’ve had these shoes for about twenty years and it really shows. I used to wear them almost every day. They’re much loved and I’ll probably wear them until they fall off my feet completely.
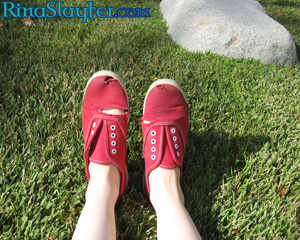
In fact, when I was in high school, I even marched in a few parades in these shoes. Depending what year, I played flute, piccolo or bells. When we weren’t in full uniform, we wore our band shirts, white pants and whatever shoes we wanted. Well, these were those. I’ve marched many a mile in them.
My First Fair
Yesterday was a challenge. Could I really get my act together enough to start selling my necklaces at craft fairs? My best friend hooked me up with the opportunity, but it was up to me to figure out displays, and bags and signs and price tags and all the other little things you just don’t need when you sell online.
Challenge met:
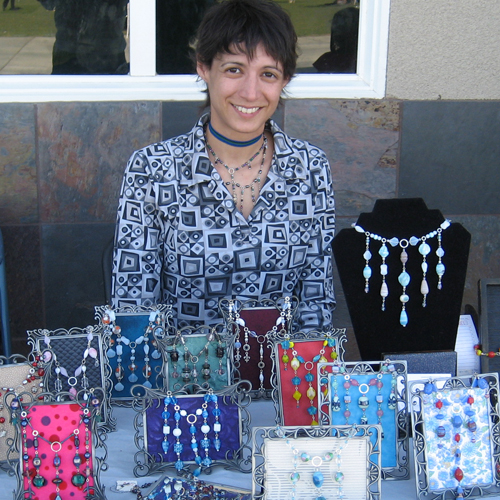
Somehow, I pulled it off. I’m still not really sure how since I’ve had this stupid cold for the last week and a half (almost gone now…almost). I didn’t even have to go out and buy stuff to make it happen. Everything I needed was either in raw materials in my craft room or literally waiting for a rainy day.
Oddly enough, those picture frames are from the 99 cents store. I got them probably 4 years ago. I know it was a long time ago. The idea was to use them for photos my husband had taken during our trips all over England, Wales and Scotland which I displayed in my front room. I also had a bunch of Medieval images on postcards that I’d never send, so why not frame them? Well, I’d filled up all my larger frames and these little ones were left over.
Had it not been for a real slap-job cleaning the house, I would’ve completely forgotten them.
My husband and I were trying to figure out what to do with some acrylic grapes I’m storing our best friend. As I stood there grimacing in my front room, my gaze landed on a stack of two trunks behind our couch. I knew one was full, but the other? I cracked it open and managed to fit just about everything in there. Only a few things left.
There’s a Victorian trunk on the other side of the room, so I had my husband open it. It wasn’t just full, I couldn’t’ve added a piece of paper or the lid would not’ve closed. Almost nothing but picture frames. Some empty, some full. The memory of hoarding came back to me. They’d been nice frames for cheap. I couldn’t resist because “I knew I’d use them for something…”
That “something” ended up being my very first fair. All I did was pull out the glass and replace it with cardboard which I spray glued different fabrics onto. Something tells me my hoarding impulse paid off pretty big on this one!
My Twilight’s Fancy necklaces just don’t display well flat. They need a little gravity acting on them. To see more, click here!
My Shoe Chronicles — Peacocks
I call these my peacock shoes. I don’t know what possessed me to buy them, but they sure are fun to wear.
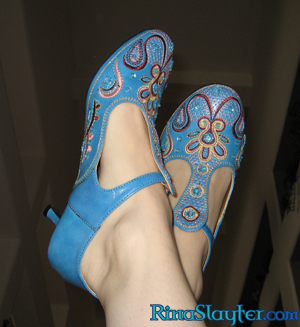
They’re not the best quality and I don’t know that they can sustain a lot of wearing, but they’re definitely strange and that was the main reason why I bought them. It doesn’t hurt that they’re one of my favorite colors, too. Weird, loud and colorful. My ideal pair of shoes.
I got these at the same store in Chinatown where I got those simple olive green leather shoes, too. These aren’t as well made, but what they don’t have in durability, they make up for in strangeness. Plus, its not like I plan on wearing them every day. Believe it or not, I don’t have that many outfits I can wear with them.
The Voltage Regulator Fried
Any time there’s a malfunctioning part on one of my cars, I like to save it. Sometimes it serves as inspiration, sometimes it just looks cool. Like, to help get over the expensive sadness of the engine I blew up on a very bad day, I kept the fried bearings. They’d gotten so hot, they’d melted. Yeah, molten metal in my engine. I don’t ever want that to happen again, so seeing those bearings reminds me to check the oil and all-in-all pay attention to what my engine sounds like.
I even saved the warped and cracked valve out of my convertible ’68 Mustang…and the busted exhaust manifold has spent time as a pen holder on my desk although not anymore. It got replaced when I unearthed my Ziggy pen cup from when I was little (It says “Genius at Work” and is likely copyright 1980!).
So, anyway, when my ’68 Mustang Convertible was still running rough even after the engine swap, it was time to figure out why. The battery had died a few times, too.
That should’ve been my first clue. That, plus the dim headlights, flickering interior lights and the general rough ignition problems. The funniest part of the whole thing is how simple of a part it was, but how quietly it broke. It’s not the kind of thing that goes Ka-Pow! and suddenly the car stops or makes awful noises.
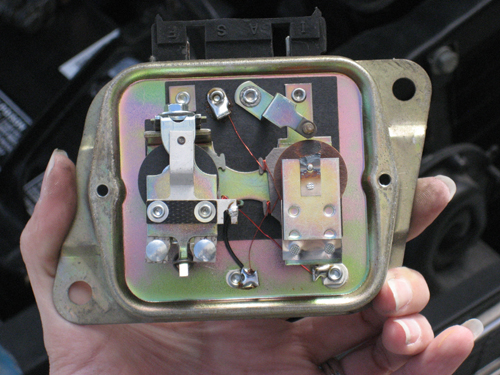
Changing it out was real easy and now it sits on my shelf of odd tidbits…including the busted rocker stud from my husband’s ’66 Corvette and the interior build sheet from my ’68 Mustang fastback, etc.
 RSS Feed