Vampire Bite Choker – Be Smitten. Get Bitten.
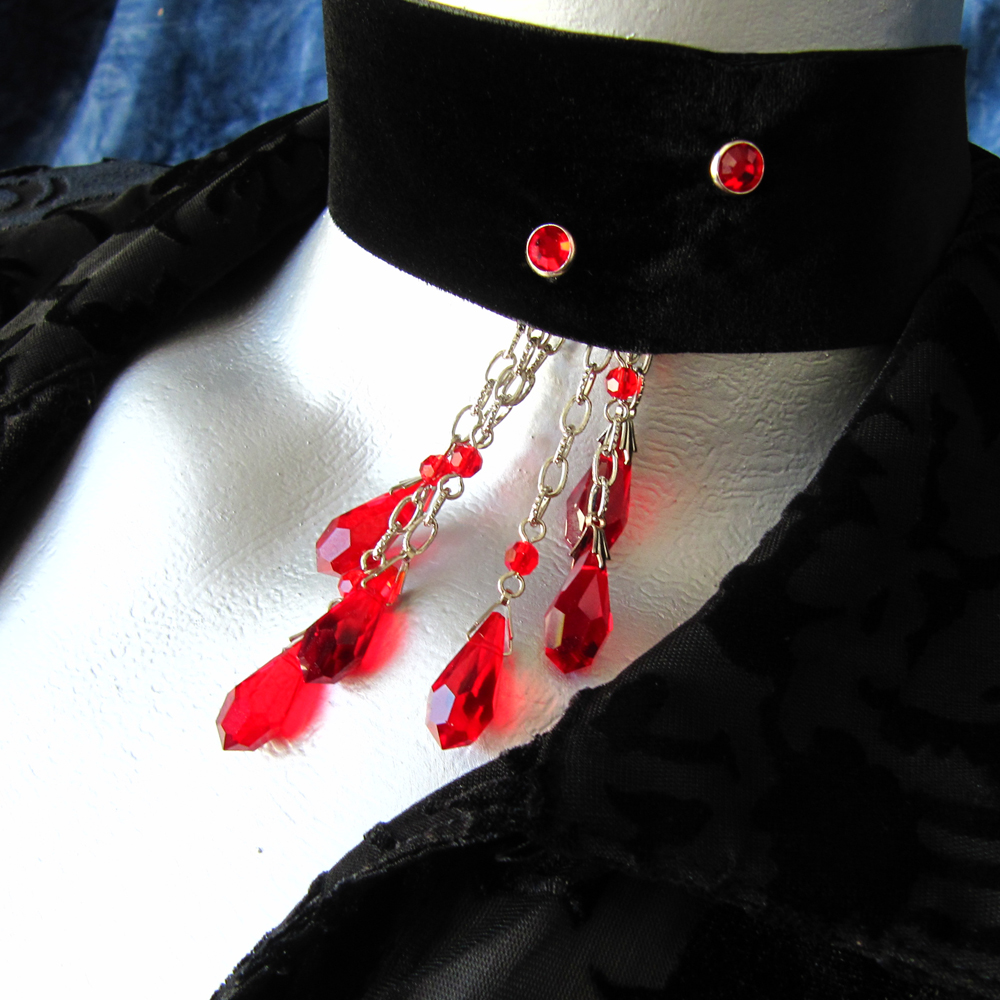
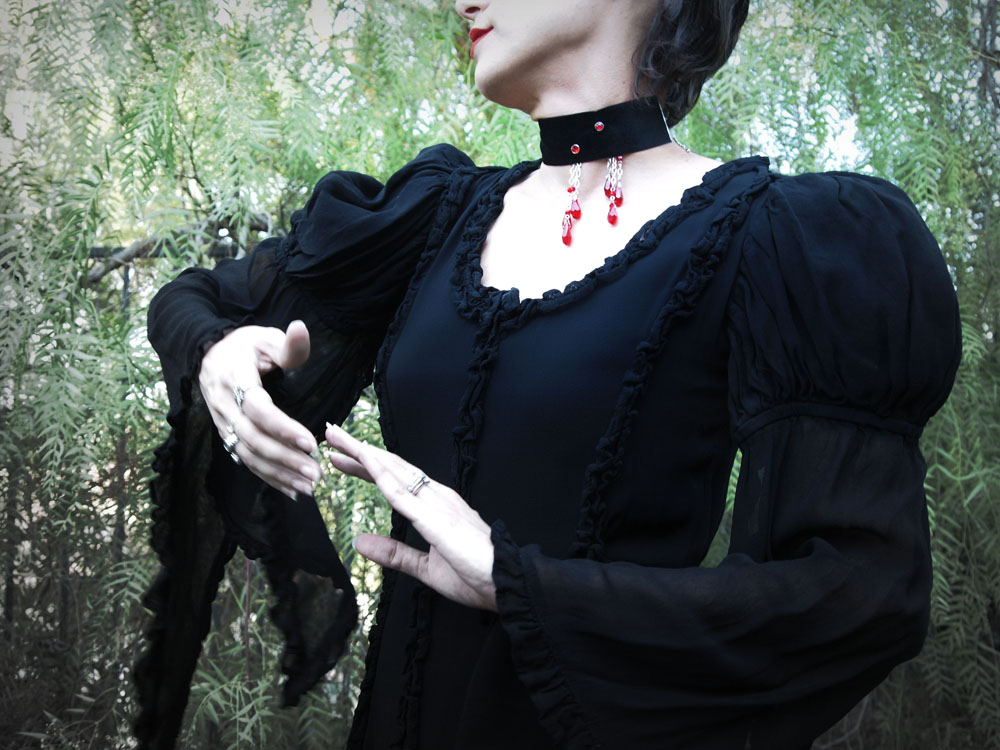 This is my latest creation. It’s a wide black velvet ribbon choker necklace with crystal drops hanging down like blood from a vampire bite.
It’d be a great Halloween costume piece or for cosplaying at cons. I wear mine around town. Why not? Some days I pretend I’m a vampire slayer who got a little too close to a dark and sexy fangboy. Some days, I’m little more than a willing slave.
This year has been a crazy one for me. Between the success of my husband’s new audio company, Schiit, the continued success of Twilight’s Fancy and all the writing I’ve been doing with my best friend Jen as Ashleigh Raine, it’s been awesome. Although, I gotta admit my favorite part has been getting to call my husband a SchiitHead. Like, he really is…and he doesn’t get mad when I call him that! How awesome is that?
 When I’m not building vampire chokers, I’m soldering circuit boards. But next year… Well, let’s just say that Jen and I have many, many plans we hope to execute. I for one have many costumes I’d like to build, too. I just hope I can find the time to do everything I want to do.
I gave Jen a vampire choker for her birthday. It just seemed fitting since our friendship started around when the Lost Boys premiered in theaters: October of 1987. We met in 1988 and one of our favorite things to do was watch Lost Boys-—on VHS!—-at my house because Jen’s mom wouldn’t let her watch R rated movies yet. I think I wore out that video tape. Seriously. I used to put on that movie nearly every day after school while I did my homework.
Alex Winter played Marko and wore a like totally awesome jacket with patches and chains—-oh, it really hit my fashion-ometer as far as incredible coolness. It pegged it, actually. Pegged it so hard I chose one of my denim jackets from my closet and set to work embellishing it with rhinestones and chains and all sorts of craziness.
I still have that jacket.
It weighs about ten pounds now.
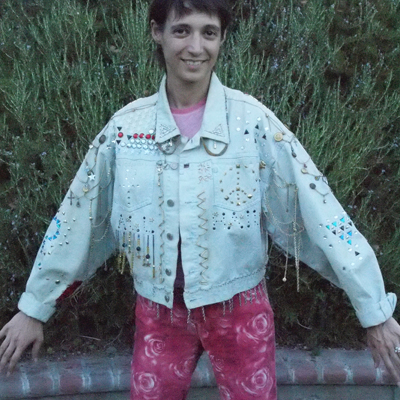
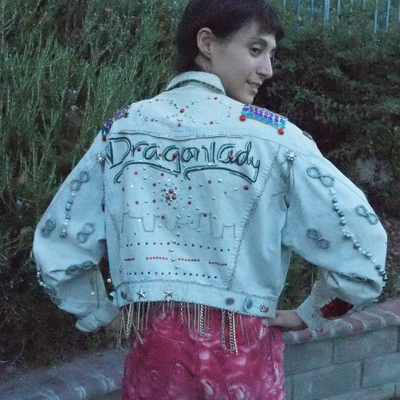
I just got my husband to finally take a picture of me wearing the infamous Dragonlady jacket. Some of the stones and whatnot have fallen off over the years, but that gives it the proper worn look…like Marko’s jacket.
I just find it incredible that because of my experiences, all the 250+ hours I put into that jacket, when it came time to do the vampire choker, not only was it a natural extension of my love of vampires, but I also already knew how to do all the components…and make it reversible. Yeah. The blood dangles can go on the left or the right without having to unhook anything. Just turn it around.
I love how certain things have stayed with me over the years. Certain events, people, experiences never really age as far as I’m concerned. There are things that I still talk about as though they happened yesterday. Things that I did that still feel like yesterday. And I wouldn’t change a thing…well, perhaps I’d blog about it all more…
In any case, if you’d like to get your very own vampire bite choker, click here!
How to make a ribbon choker necklace
 I’ve done a bigger, better tutorial at ribbonchoker.com about how to make a ribbon choker necklace or ribbon bracelet.
I’d like to thank my wonderful husband for taking all the photographs without too much grumpiness. That was very sweet of him. I suppose it helps that he’d just gotten a new camera and was excited to use it. I know that while he loves me, shooting me building ribbon chokers isn’t likely his favorite pastime, so that new camera came in handy.
Although, he ended up using my camera for much of it. Anyway, this was a project that took me about a year to complete, but I only recently got the domain name. I dunno why I didn’t think of it sooner. I nearly fell outta my chair when I saw that it was available. The tutorial here on this site is okay, but ribbonchoker.com is far more comprehensive, with better pictures that open up into larger ones so you can see what I’m talking about.
I’ve got a lot of other things going on in my world right now. One I can’t talk about yet, a few I’ll be able to talk about soon and one that I can more fully announce any day now.
If you’ve followed my twitter feed or have friended me on facebook, you might occasionally read that I’m soldering circuit boards. It’s no secret that I’m a multitalented chick-a-dee, but for instance, the day we photographed the tutorial, we also moved a few more units through production. My husband has designed a solid state headphone amplifier and we are just about ready to start shipping units.
Once upon a time, he was a high end audio engineer and I guess he sorta missed those days when a friend of his gave him a headphone amp. After listening only once, I started hearing him say that he could do a better one…with mosfets. (New to electronics? So am I. In fact, don’t tell him, but I don’t exactly know what a mosfet is, but I know where the go on the circuit board and how to solder them in place and attach them to the heat sink.)
Anyway, while he was chugging away at the design, I was putting together my ribbon choker tutorial. Occasionally, we’d meet somewhere in between and help each other out. He’s terrible at making ribbon chokers, but I’m really good at soldering circuit boards. We make a great team.
When we’re really ready to make this officially official, I’ll announce our company name and website. These amplifiers make my favorite music sound awesome. I listen while I solder.
I’m also still selling vintage sewing patterns, ribbon chokers and Twilight’s Fancy necklaces in my ArtFire shop.
How To Make A Ribbon Choker Necklace — Part 3
UPDATE: For a better tutorial, visit ribbonchoker.com.
The ribbon choker necklace is almost done. I’ve laid out everything needed in order to finish it. The ribbon with clamps installed, the jump rings, clasp and extension chain.

Step five: ADDING THE FINDINGS AND FINISHING!
Open a jump ring.
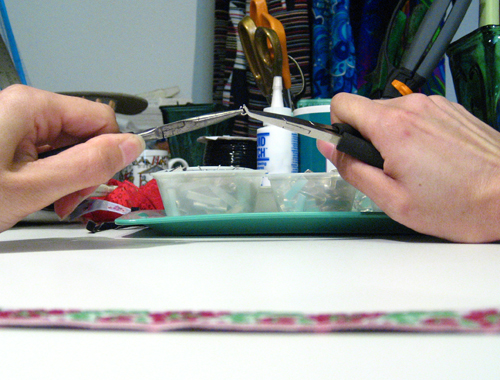
Put the clasp on it and close it.
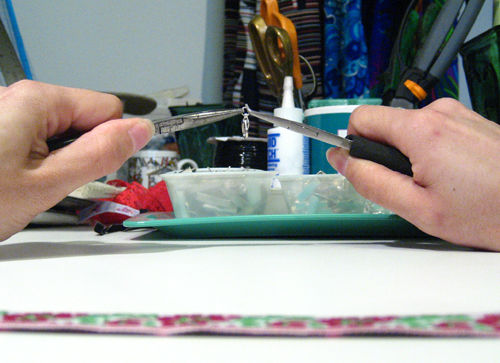
I put this extra jump ring onto the clasp so that it will lay right when it’s attached to the ribbon clamp and allow a little extra room for your thumb to work the clasp when you wear the necklace.
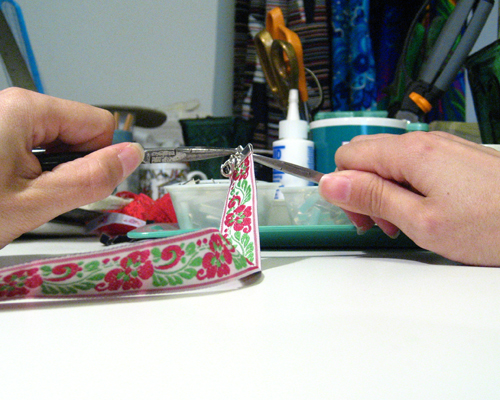
Open another jump ring and this time join the ribbon clamp to the jump ring on the clasp and close it.
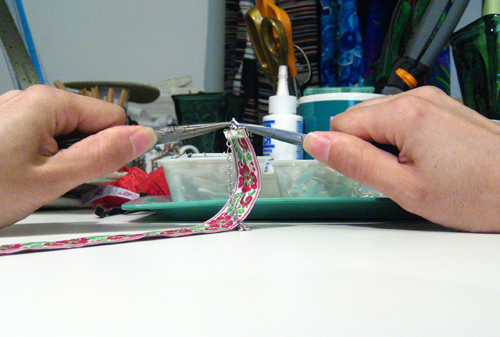
Finally, open the last jump ring and join the extension chain to the other ribbon clamp.
There you have it! A beautiful ribbon choker necklace!

This one doesn’t exactly match what I happened to be wearing that day, but oh well. I had fun making it!

To see more of my work, visit my Etsy Store and my Artfire Store. If you mention my ribbon choker how-to blog series during checkout of any purchase from my shop, I’ll include a free ribbon choker necklace.
My First Big Show
I’m not saying that my booth was big, but that there were a lot of booths and people cruising around at the Rose Bowl Flea market. I enlisted the help of a couple of my friends and they got to take in the flea market for the day because I was totally able to hold down the fort solo.
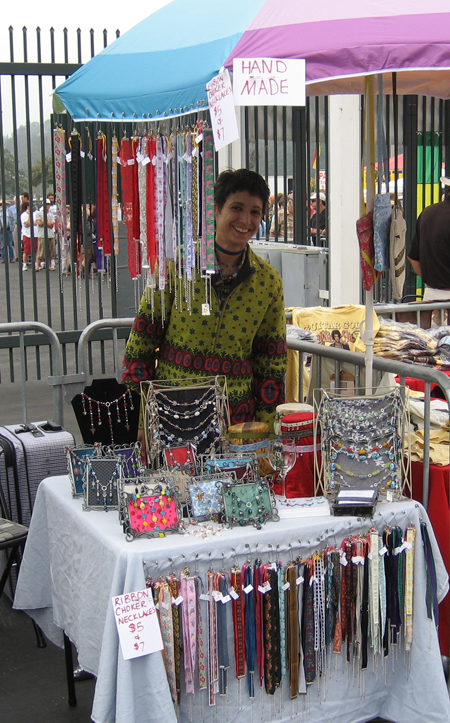
This is like a new chapter in my life. I’ve gone to many flea markets and craft fairs, but I’d never had a booth at one. And, well, here I am.
And I don’t think I can get enough. It’s lots of fun to meet people, too, so look for me doing many more of these shows in the future. I cart all of my handmade inventory out to these things, so if there’s something you’ve seen in my shop at ArtFire or Etsy, and want to see in person, come see me at a show if you’re in the LA area. I’ll announce which shows I’m doing when, of course, so please check back or subscribe to my RSS feed.
I also bring new stuff to the shows that hasn’t been posted to either of my shops yet. (I figure that if I sell it at a show, then I need not photograph it, etc.!) At the Rose Bowl, I had several new Rina necklaces, ribbon chokers without beads and new embroidered ones, too.
How To Make A Ribbon Choker Necklace — Part 2
UPDATE: For a better tutorial, visit ribbonchoker.com.
This is where it all starts to come together. Remember, there are plenty of other ways to make a ribbon choker necklace, I’m only presenting the way I do it.
Step three: MEASURE AND CUT!
There are a few ways to figure out the length of ribbon you’ll need. It’s always a good idea to measure the neck you’re about to make the necklace for just so you’ll have a number to reference later.
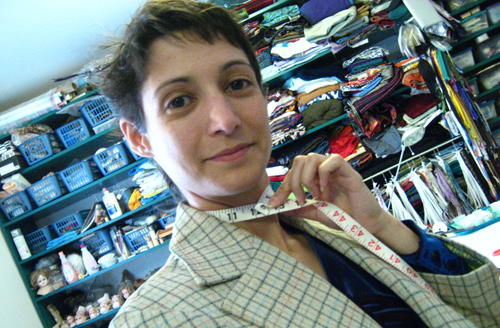
Yes, I have a very small neck.
Using a measuring tape is easiest. If you don’t have a measuring tape, you can also run a string, ribbon, shoelace, whatever around the neck, pinch your fingers over the spot where the end meets the rest and then measure that length with a ruler.

No matter which method you use, subtract a little more than an inch. If you’re not using an extension chain, you might want to subtract only 3/4 of an inch. I like to subtract at least an inch. That way I’ve got more room to adjust not only how tight the necklace is, but where it’ll land on my neck. I can wear it tighter which’ll make it sit higher or looser which will make it lower on my neck.
Sometimes the wider ribbons will need to be a little shorter because they’ll end up sort of conical around your neck rather than perfectly cylindrical. You’ll definitely want some room for adjustment on those.
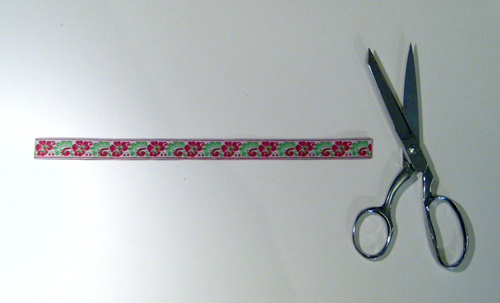
No matter what the length of your ribbon, make your cut perfectly straight across perpendicular to the length of your ribbon. If the ribbon wants to fray, cut the fuzz away, too. You want good, solid ribbon inside the clamp.
There are anti-fray products as well as glue that you can use, but it’s not necessary unless you’re working with a particularly thin and finicky ribbon that would rather fray than cooperate. If that’s the case, the ends will need to be treated or even folded and sewn.
I haven’t needed to take any drastic measures other than a dot of fabric glue to hold down the thread on the back of some of my beaded and/or sequined ribbons. I just don’t want them to unravel and all I do is load the tip of a toothpick with fabric glue, touch it to the thread and push it down to the back of the ribbon at the very edge so that it’ll be completely hidden when the clamp goes on.
Step four: PUTTING IT TOGETHER!
Choose the right clamp to fit your ribbon.
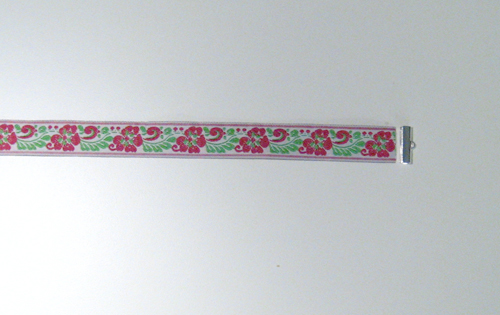
I was lucky in that the clamp and the ribbon match in size. On my wider ribbons, I have to iron the corners down and cut a new edge in order to match the thinner clamps.
Still with me? Now we’re really turning this bit of ribbon into a pretty necklace.
Put the clamp in the pliers. (Sorry about my photography. I did this whole series by myself and sometimes I really needed a third hand to help out. At least it shows that you don’t need much room in order to put these together.)
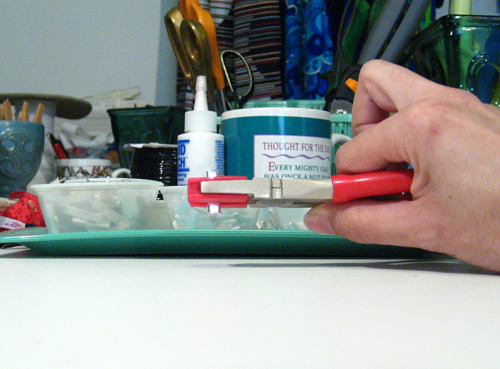
Now for the fun part. I’ve got the clamp in my pliers, ready to compress. I add the ribbon with my other hand, holding it between my thumb and forefinger to keep it centered in the clamp. My other fingers are pushing it into the clamp.
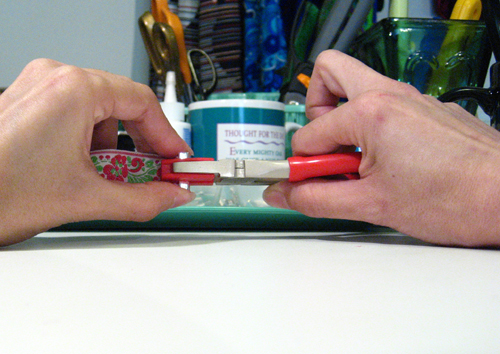
Now smash the clamp closed. I usually get my thumb and forefinger a little stuck. There’s a knack to not hurting them and even after as many as I’ve made, I still get pinched now and then!
It won’t be closed all the way just by compressing it in the middle. Keep your fingers in place, holding the ribbon or it’ll slide out or go crooked and that won’t look very nice. Move the pliers to the top and squeeze. Then move them to the bottom and squeeze.
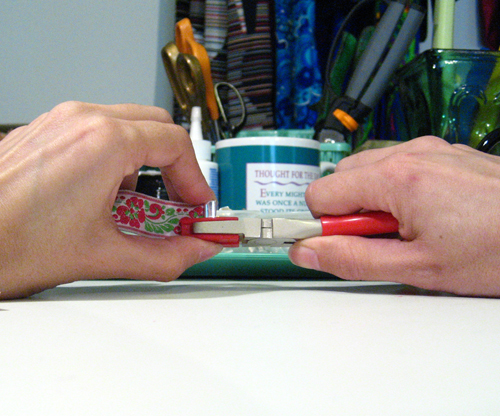
For good measure, I like to give two more squeezes along the length of the whole clamp. One on each side just for good measure.
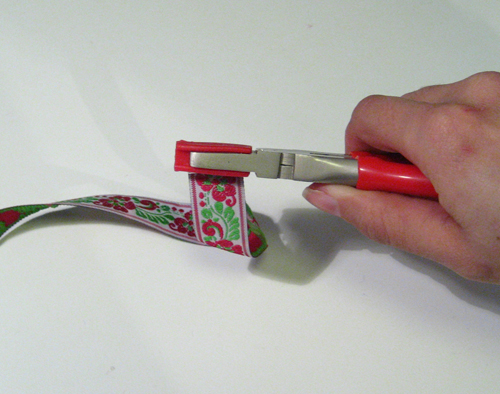
From here, all that’s left is putting on the findings…which I’ll show you how to do next time.
To see more of my work, visit my Etsy Store and my Artfire Store. If you mention my ribbon choker how-to blog series during checkout of any purchase from my shop, I’ll include a free ribbon choker necklace.
How To Make A Ribbon Choker Necklace — Part 1
UPDATE: For a better tutorial, visit ribbonchoker.com.
I think it’s pretty safe to say that we all know ribbon comes in many different shapes, sizes, colors and in various ways. Sometimes it’s on a spool, sometimes it’s wadded up and shoved in the corner of a box long forgotten, sometimes it’s on cards or wrapped around a gift. My ribbon comes from all sorts of places. Some is old, some is new, some is plentiful, some is just a scrap. But I treasure it all.
In this series of posts, I’m going to show you how to make a ribbon choker necklace. I’m sure there are many other ways of doing it, but this is how I do it and I hope it helps get your creativity flowing in bigger, better ways, too.
Okay, step one: GET RIBBON!
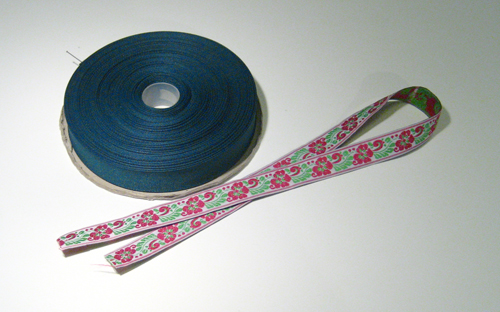
For this series, I’m going to use the flowery ribbon. It suits my personality.
Step two: GET TOOLS!
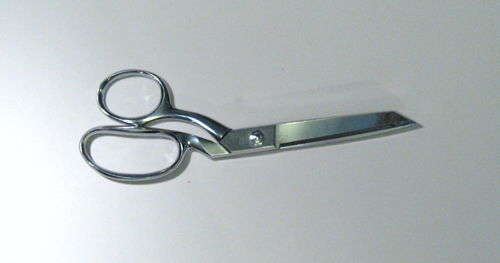
I like to use fabric scissors because a clean, straight cut is very important. Sometimes I use a rotary cutter, but that’s mostly when I’m making several necklaces at once. I lay the ribbon on my cutting mat and do a few long slices rather than cutting each necklace individually.
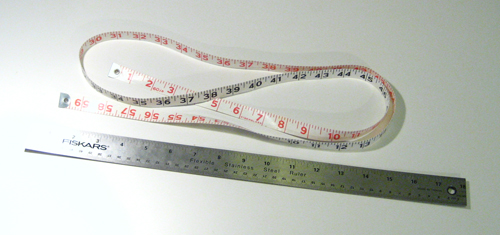
While it’s possible to make a ribbon choker without having a tape measure or ruler, sometimes they really come in handy. Especially if you don’t always have the neck that you’re making the choker for. If you measure your sister’s neck that first time, write it down so you can make more for her without having to measure…unless she’s still growing. You don’t want her to outgrow your necklaces!
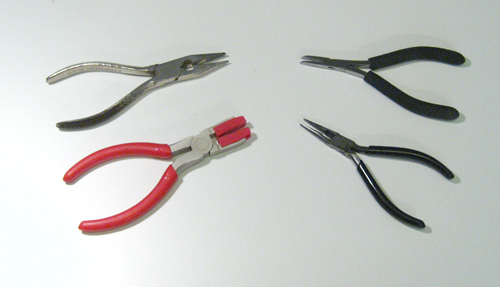
Here’s where things get a little tricky when it comes to tools. Pliers are a necessity, but the type of pliers can vary. I like to use one pair of bent needle nose pliers with a pair of straight needle nose, but you could easily use two straight ones. Basically, you need two pairs of pliers with small tips.
The red pair of pliers was specially designed for bending wire. There are plastic wedges on the nose so that when you bite down on wire, it won’t get scratched. While this pair is not necessary, I highly recommend it so that you won’t scratch up your metal ribbon ends.
Before I got these inexpensive pliers, I actually devised a rather strange way of using two small blocks of wood to smash the ribbon clamps closed. While that method worked and didn’t scratch, it was rather unwieldy. If you’re using textured ribbon clamps, scratches are easier to avoid…or at least they don’t show up as clearly through the design.
Step three: GET FINDINGS!
Ribbon clamps come in many different sizes. Since I make chokers out of a lot of different sized ribbons, I have an array of clamps which I can use. Some are textured and some are smooth. I’ve seen them sold in multi-packs, too. Basically, you need the one that most closely matches the size of the ribbon you’ve chosen to use. It can be a little bigger, but I don’t recommend going much smaller.
The main thing the clamp does is keep the ribbon from fraying. If the clamp is too small, the edges of the ribbon will start shedding and fraying. A clamp that’s too big just looks a little funny, but I’d rather it looked funny than have the ribbon fall apart.
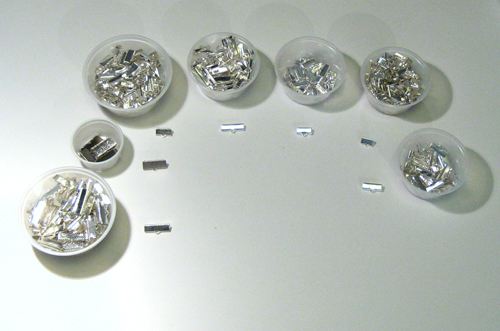
Finally, you’ll need various necklace findings.
Jump rings, clasps, more jump rings (because I can be obsessive sometimes) and extension chains.
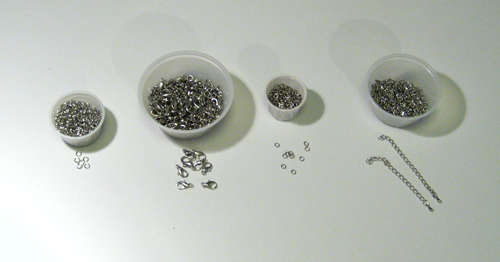
I like to use two different sizes of jump ring, but it honestly doesn’t matter. I’m mostly just trying to use up what I have. I use the extra jump ring to make the clasp line up better.
Clasps are also a thing of personal preference. I like lobster clasps, but any clasp will do.
Extension chains are not necessary, but they sure do help a lot. For instance, if you accidentally made the necklace too small, it’ll still fit perfectly with the extension. Also, an extension chain can facilitate where the necklace sits on your neck whether high or low. They aren’t absolutely necessary, but I highly recommend them.
You can make them out of old necklaces, too. Just cut 2 or 3 inches from a length of chain. If you’re in the mood, add a charm at one end as a nice little personal touch.
Up next will be how to use all these tools and supplies in turning a length of ribbon into a cute little necklace.
To see more of my work, visit my Etsy Store and my Artfire Store. If you mention my ribbon choker how-to blog series during checkout of any purchase from my shop, I’ll include a free ribbon choker necklace.
My First Fair
Yesterday was a challenge. Could I really get my act together enough to start selling my necklaces at craft fairs? My best friend hooked me up with the opportunity, but it was up to me to figure out displays, and bags and signs and price tags and all the other little things you just don’t need when you sell online.
Challenge met:
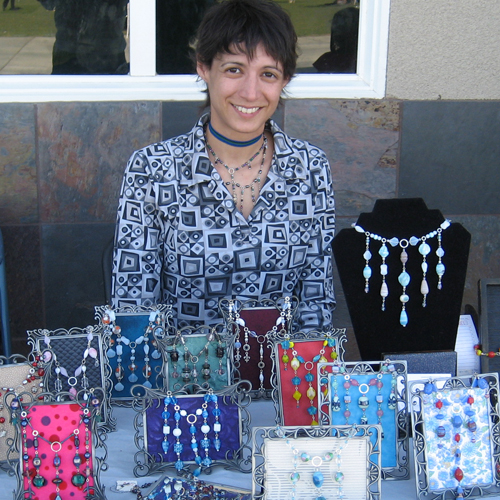
Somehow, I pulled it off. I’m still not really sure how since I’ve had this stupid cold for the last week and a half (almost gone now…almost). I didn’t even have to go out and buy stuff to make it happen. Everything I needed was either in raw materials in my craft room or literally waiting for a rainy day.
Oddly enough, those picture frames are from the 99 cents store. I got them probably 4 years ago. I know it was a long time ago. The idea was to use them for photos my husband had taken during our trips all over England, Wales and Scotland which I displayed in my front room. I also had a bunch of Medieval images on postcards that I’d never send, so why not frame them? Well, I’d filled up all my larger frames and these little ones were left over.
Had it not been for a real slap-job cleaning the house, I would’ve completely forgotten them.
My husband and I were trying to figure out what to do with some acrylic grapes I’m storing our best friend. As I stood there grimacing in my front room, my gaze landed on a stack of two trunks behind our couch. I knew one was full, but the other? I cracked it open and managed to fit just about everything in there. Only a few things left.
There’s a Victorian trunk on the other side of the room, so I had my husband open it. It wasn’t just full, I couldn’t’ve added a piece of paper or the lid would not’ve closed. Almost nothing but picture frames. Some empty, some full. The memory of hoarding came back to me. They’d been nice frames for cheap. I couldn’t resist because “I knew I’d use them for something…”
That “something” ended up being my very first fair. All I did was pull out the glass and replace it with cardboard which I spray glued different fabrics onto. Something tells me my hoarding impulse paid off pretty big on this one!
My Twilight’s Fancy necklaces just don’t display well flat. They need a little gravity acting on them. To see more, click here!
Contest! Handmade Prizes!
 So, I’ve mentioned time and time again that I also write romance novels as half of the Ashleigh Raine writing team. Our next book is coming out in April and we wanted to do a contest/giveaway in celebration. Whenever we decide to do a contest, the next question is always what will the prizes be.
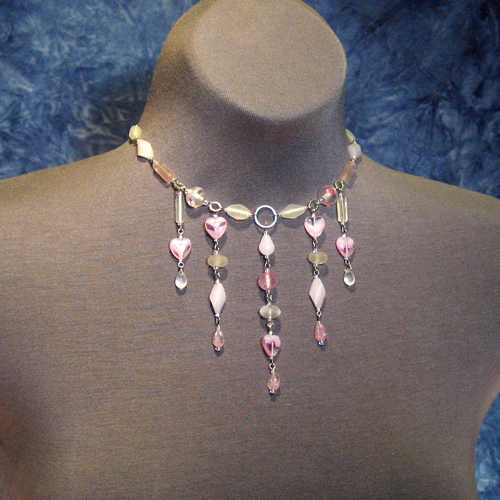
We both had a ‘like duh’ moment. My handmade stuff would be perfect. It’s all 100% original, unique and will never be duplicated, so why not? Plus, since our next novel is Forsaken Talisman, book two of our Talisman Bay series and in that series Twyla Emerson is a bead-oholic (gee, where’d we get that inspiration? Hmmm…?) it makes sense that the prizes are from as close to Talisman Bay as anyone can get.
So, if you’d like a chance to win one of seven different prizes, head on over to the Contest page at AshleighRaine.com for complete details.
In the mean time, I’m going to immerse back into Twyla’s “damn bead room”–as she so affectionately calls it–and have her help me make some more Twilight’s Fancy necklaces. Good luck on your contest entry!
Blissful
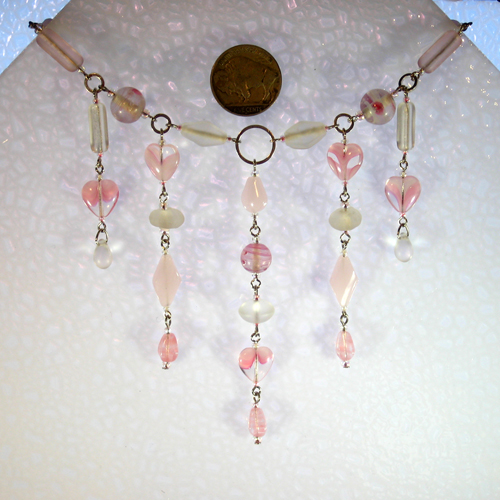
When I began designing this necklace, I got a little interrupted for a great reason: Inspiration.
I haven’t listed the other necklace just yet, so look for it within the coming weeks, but as I was working, I saw some beads in my collection and thought they wouldn’t work for the necklace I was working on, but they’d be great in their own. And when inspiration happens, I run with it!
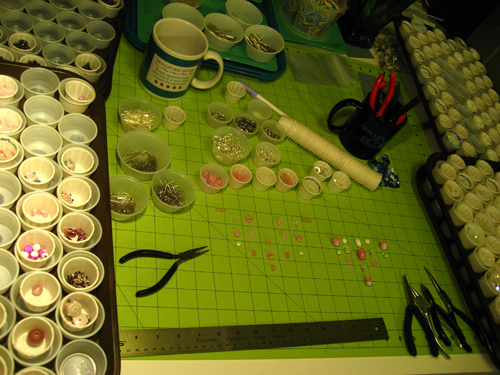
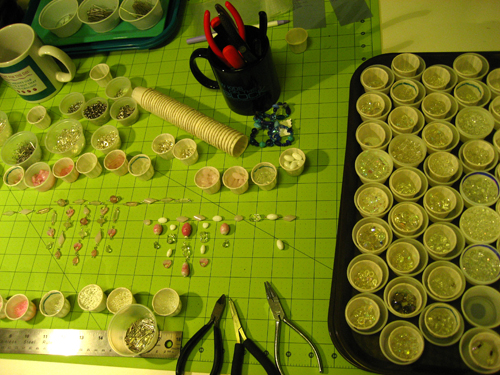
So this was the first time in years that I worked on two necklaces concurrently. It seemed like I’d place a bead on one and then place a few on the other. I just kept on going because both necklaces seemed to be playing off of each other. Like, one could not have happened without the other even though they don’t rely on the same beads.
I don’t know if this will be a common occurrence, but I most certainly welcome it if it happens again! I already love designing and building Twilight’s Fancy necklaces, but when they come together the ways these two did, it’s like opening a whole new world for me in a way because I didn’t know it was possible.
I’ve designed more than one necklace at the same time, but never quite like this. The others came together more linear, one after the other with only a few beads overlap. These were together. I’d laid out a few beads on one and then a few on the other and they both finished at the same time. I actually had to pay attention that I didn’t mix the two up when I assembled them!
Or perhaps the following three would interest you:
Midnight Grace
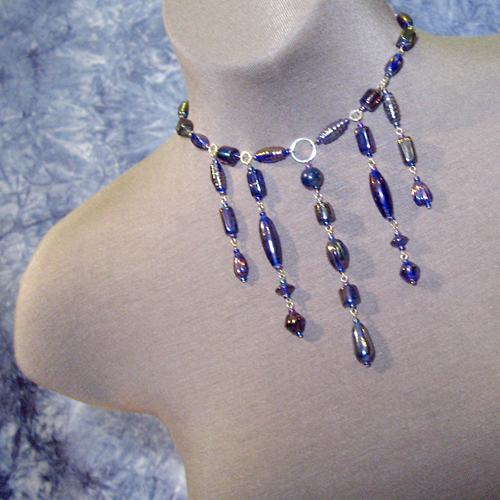
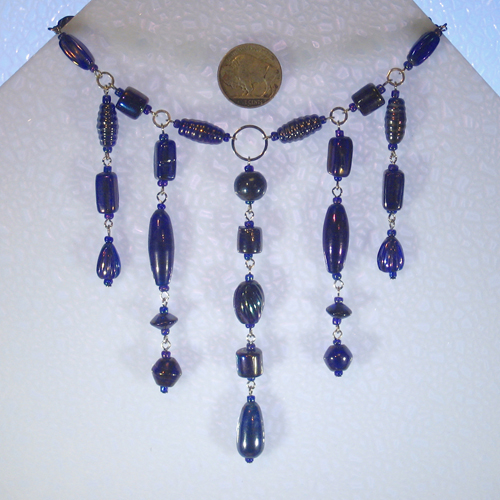
Every now and then things come together so easily, I declare it graceful. That’s what happened with this necklace. It. Just. Came. Together. Yeah, it designed itself. I hardly had to do anything but make sure the beads were in the right place.
Like, I’m betting that it still would’ve come together if I’d tripped and dropped the bead tray all over my table. I almost didn’t list this one, too, because I don’t have my own blue one. After all, in Lover’s Talisman, it’s a blue Twilight’s Fancy necklace that is the talisman.
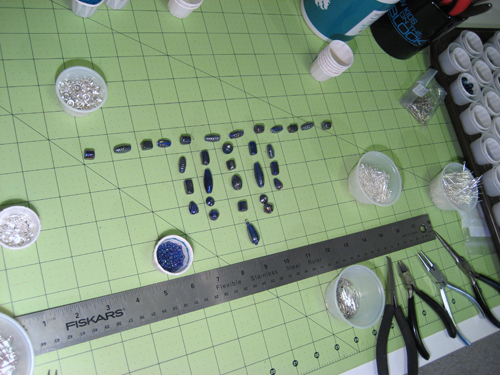
Notice how in the picture there isn’t a huge pile of beads in cups around the necklace. It’s just right there, ready to be assembled. Yeah, that’s seriously how easily this thing came together. Sometimes I agonize over where the beads go, which ones I want to use, how to embellish, how many dangles, etc. Not this time. I think that’s one of the reasons I want to keep it for myself.
Then again, if someone else buys it, they’ll collect the good karma that is flowing through it and I’d rather spread that kind of joy. I’m sure there’ll be others for me. Plus, being the master of all I survey in my craft room, there’s no reason I can’t just design and build one for myself. Like, duh.
Which reminds me, if you want me to build you a custom necklace, all ya gotta do is contact me through my Twilight’s Fancy shop and let me know what color(s), etc. you’re looking for. My bead collection is monstrous. I bet I can put something together for you in no time flat!


