I Can’t Stand It Anymore!
It’s after 1AM and I just gotta get blog. I just gotta. I’ve gone too long since my last post. There are many really great reasons for that, too, though.
I’ve been making lots and lots of necklaces, developing new designs, even selling them at swap meets just to do that inevitably fun ‘something’ with them this time around.
I just got home from a New Kids on The Block concert. They were awesome as always. I even met them ahead of the show. Tonight was my seventh time. Back in the day, I went to 9 concerts, but was never able to meet them. I suppose I’m making up for that now and I’m sooooooooooo glad for it. They were absolutely worth the wait.
Because I’m too lazy when it comes to myself, I use the concerts as incentive/inspiration for me to create more outfits. I haven’t even twittered the last few days because I was making a little halter top and pants/skirt. I’ve never done a halter top before, so that was quite an experience. I didn’t even have a pattern I could fudge from. I just had to do it on the fly. The pants were easy, though. Yoga pants. I can whip up a pair of ’em in less than an hour. Then, I draped a quasi-skirt over the top.
Yoga is another thing I’ve been doing more of. I barely talk about it on my blog here, but I absolutely love yoga and all that it allows me to do and feel and be. Bending, stretching, twisting…and building tons of strength…while really taking control by doing the poses and in turn, they do me, good golly, I wish I could live on my mat.
I built another website. It’s not completely finished yet, but it’s damn close. Tomorrow, I’ll be helping out at a TAPS boot camp. I absolutely love being a TAPS member. Ghosts were people, too. There’s no reason to be afraid of them. Yeah, strangeness abounds when they’re active, but that’s only if you refuse to admit what your senses are telling you. Some of the most interesting people I’ve met are dead and I plan to meet many, many more.
It seems I’ve got my hands in a little bit of everything these days and I wouldn’t have my life any other way. In fact, just the other day I was telling someone about how even two years later, I still have trouble believing I was paid to drive a Lamborghini Gallardo, a Porsche 911 Turbo and 2 Ferrari F430s. These are the kinds of things that happen in my life and I wouldn’t trade them for the world.
However, I really should blog more about them!
Anyhow, a few weeks back, at a swap meet, I scored a composition ball-jointed antique doll body. It needs to be restrung, but so do several of my other dolls–some are even on display smashed between two others so that it’s not obvious their arms aren’t really attached. Hell, some of them, their heads are just sitting on their bodies. One good earthquake and they come trembling down. Is it wrong for me to find that hilarious?
Anyhow, I wanna blog about restringing. I’ve never done it before, so I wanna see if I can do it.
My cars need some work, too. I’ve had the replacement speaker for my Prowler over 2 years now, at least. Plus, I’m finally sick of the manual switch on the fan in my ’68 Fastback. Well, it’s not really a switch. When I go to drive the car, I have to plug the fan in or it won’t turn on at all. Heaven forbid I should leave it on while I’m in yoga class. I’d come out to a dead battery and that would be very, very bad. I’ve got the proper thermostatic relay switch. I just need to install it. The wiring is already done and everything. I dunno why such a quick job has gotten backed up in my queue.
Over the next few weeks, I’ll also be doing a lot of writing. Jen’s handed the current few chapters to me. One to rewrite/edit/change, the other to draft. Eternal Talisman is gonna be an amazing book when we’re through with it. The characters come alive. They live, they love, they fight, they laugh, they lead very tumultuous lives, but yet somehow they pull it all together and help each other through.
If I can’t be back at the New Kids on the Block concert right now, I’d like to be in Talisman Bay. Maybe I’ll dream myself there tonight. That would be awesome. Have a wonderful weekend!
Repairing an Antique Doll part 8
The last bit of work was at hand. I poked the hip wire all the way through after patching the tear it made that first time and got the other button on.
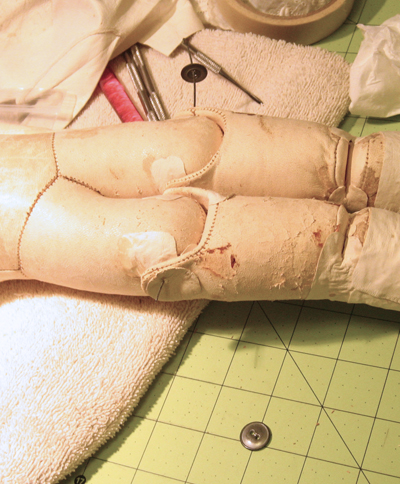
As I admired my finished job, I noticed something… Yeah, the doll just had to “one more thing” me. As if that surprise wire tear wasn’t enough, she had to “one more thing me”, too.
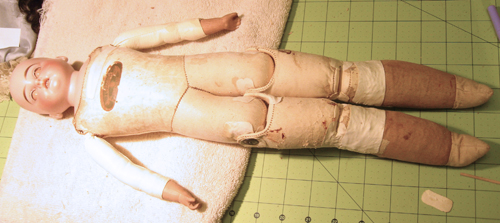
The stitching at her crotch had dry-rotted and torn. No sawdust had come out, but if that seam didn’t get reinforced immediately, there was no guarantee that her sawdust would stay in.
I got out the glue and patched her up with one last piece of kid leather.
Now she was really done and ready to be redressed.
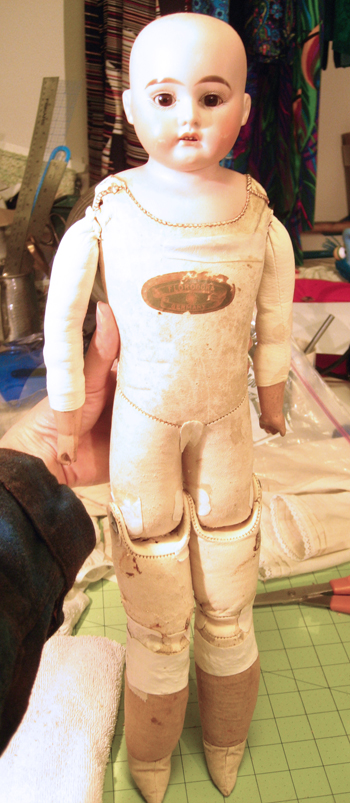
I forgot to put her cameo necklace back on when I took the following picture.
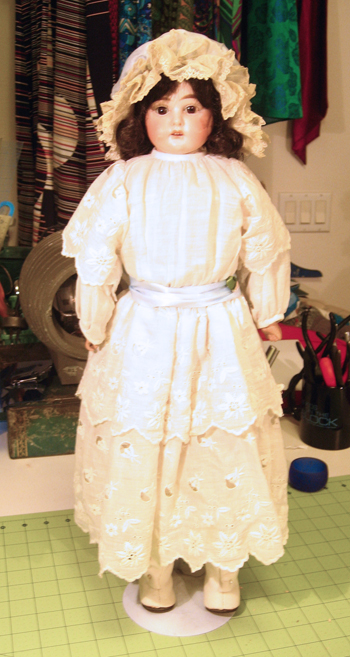
In fact, I still hadn’t remembered when I set her back on display where she came from.
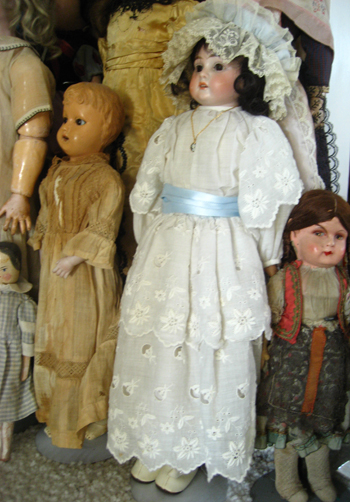
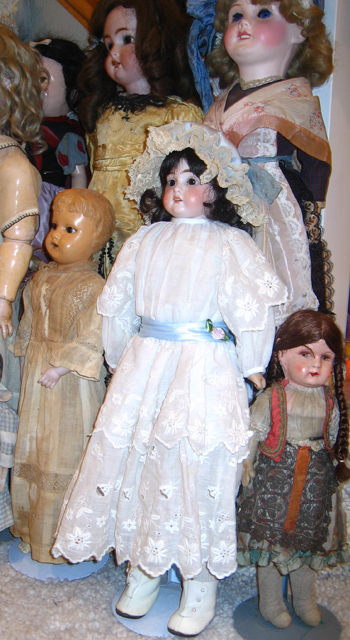
The only difference between “before” and “after” is cameo and no cameo. Oh well, I put it back on her shortly after I took the picture. Again, all the damage was hidden and there’s really no difference in what she looks like on the outside. The biggest difference is my peace of mind. Now I know she won’t leak any more sawdust just standing there.
On a side note, the doll on the left is the celluloid one whose arm fell off in my hand and I immediately put her back together. The one on the other side is one I consider haunted…well, she was when she first arrived in my collection. At some point I’ll post the EVP I got while investigating “who” was with her. In short, because she was so troublesome, I had to move her from where she was in my hallway to this location just to get her to quit being so cantankerous. (Not that she was running around, doing cartwheels or anything, but being a sensitive, I was particularly irritated by her antics.)
But I’ll get to her later…
Repairing an Antique Doll part 7
All of the patching and stuffing was complete. I’d learned a lot and was ready to embark upon the hip wire. I don’t think I’ve ever done a hip wire. I’ve done an elbow joint and a shoulder wire, but not a hip wire, although the idea is the same…except in all those other instances I didn’t have to poke more than one hole. This time, I had to do eight.
So, again I was dreading it and had to come up with something else to do until I got up the courage to dive in. Since the old buttons had damaged the leather, I figured it’d be a good idea not to put them back on the doll and risk the same problem. (Don’t worry, I kept them with the doll, just not installed on her hips!)
I have a lot of buttons. Many of which are antique. I hunted through box after box, looking for a particular pair of smooth metal buttons that I knew I had…somewhere.
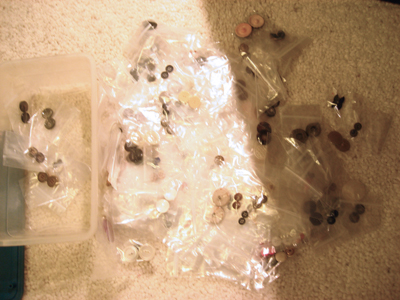
Unfortunately, my system of organization doesn’t exactly lend to easy searching. I went through about nine stuffed boxes until I found the buttons I was looking for…and realized that they’d never work for the doll. They had four holes, not two. Whoops!
I settled for another pair of two-hole buttons. They weren’t correct by any stretch of the imagination, but they were smooth, metal and had two holes. In consolation, I reminded myself that I was keeping the old buttons with the doll and if her next owner had better ones, perhaps she’d install those in place of the ones I was about to put on.
Plus, the buttons I had would work just fine and the only way anyone would know was if they pulled off the doll’s clothes. Under normal display circumstances, those incorrect buttons honestly weren’t going to matter and while the style of them wasn’t period correct, at least the material was.
So, after getting over the button decision, I hunted around for my longest needle. Then, I inspected a few doll bodies with similar hips in order to help me determine the best placement for the legs onto the torso. Then…I took a deep breath…and started poking some holes.
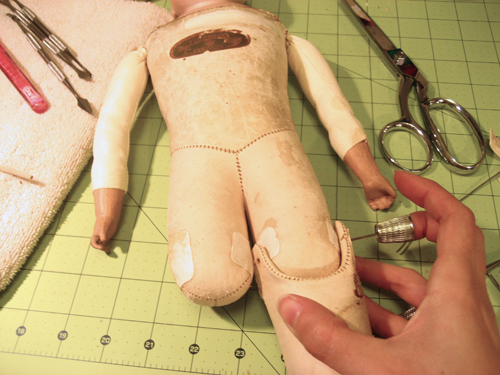
The hardest part was working the wire through. I couldn’t get it completely straight, but it was real close. And as if to spite me, as the wire was coming through the last hole, the leather tore a little. I was so pissed I didn’t take pictures of the surprise patch job. I just sighed and got it done so that I could work the wire back through, install the button and bend the end back through the other button hole.
Repairing an Antique Doll part 6
The doll’s torso has been patched up and so has one leg. That left the leg that needed the most work. The previous glue job had been so bad I needed a blade to cut away the glue.
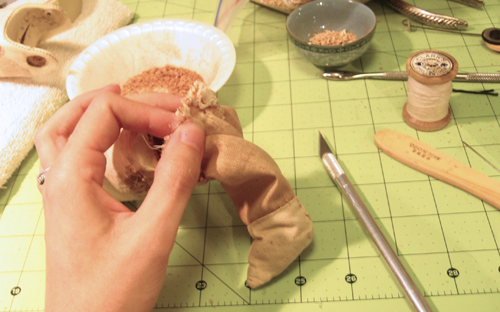
That was certainly no picnic, either. I’m just glad that whoever had made the quasi-socks over the feet didn’t glue them. I’m sure they would’ve been done as poorly. Whoever had done the socks was a great seamstress and did a far better job than I ever could have. I was so glad they’d been done, too, because that would’ve been another task for me to dread.
And on that note of dread, rather than proceed to stuff the leg, I decided that I needed to figure out what I was going to do about the hip wire. I didn’t have any. The closest stuff I had was aluminum and therefore too flexible. I needed something stiff but not as thick as a coat hanger. Hmmm…
I hunted around in the garage after rooting around in my sewing room. Nothing.
But I seemed to recall a spool of bailing wire somewhere… It might be too thin, it might not, but I needed to find it in order to find out and yet it was nowhere to be found.
Still dreading stuffing the leg, I thought outside the box… Well, outside anyway. I knew the wire had been used to hold up some vines on the side of the house so I went out there because maybe, just maybe, there’d be a tail on one of the lengths.
Sure enough, there was.
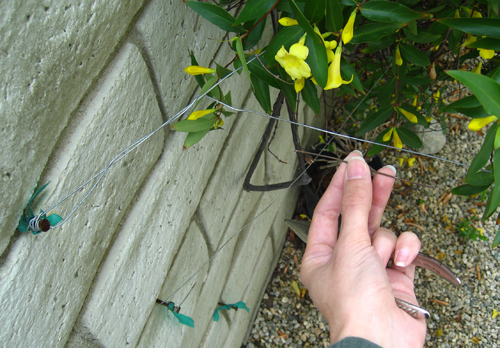
Yay! I cut off the whole tail and used that thrill to fuel the stuffing of the other leg.
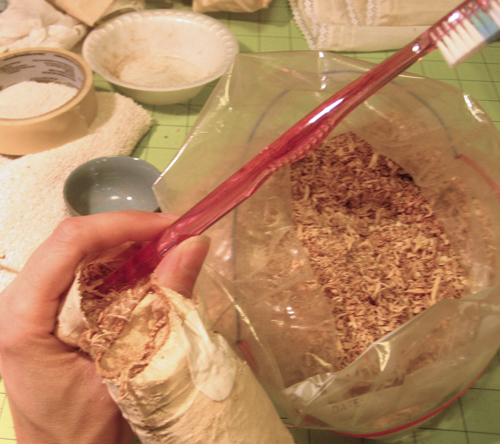
I was there for what felt like an eternity. Spooning in sawdust, packing it down with the toothbrush handle, spooning in more sawdust, packing it down even harder. I even accidentally rammed the toothbrush through the fabric and had to do another patch. (I was too pissed off to take photos of that expedition!)
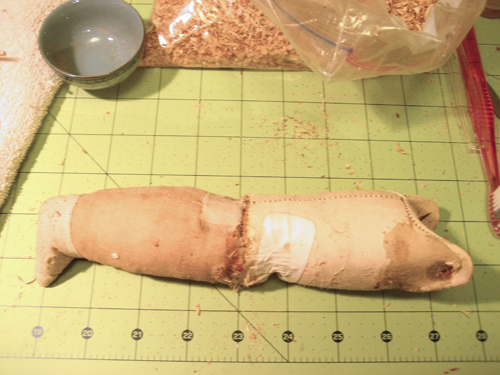
Once I got it fairly well stuffed, it was time to do like I’d done to the other leg and wrap a piece of leather around, stuffing as I glued it down. Stuffing and packing and stuffing and packing. I’d discovered that in my set of carving tools I had one that was more cylindrical like the end of my toothbrush except smaller. That was what I used on all the finishing stuffs for each of the holes and tears. (I just now realized I’d forgotten to mention what I’d used! Sorry.)
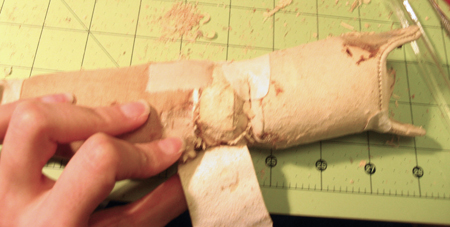
Once both legs were stuffed and patched, I reinforced the tops of the legs, too, by cutting circles out of the old leather and regluing them.
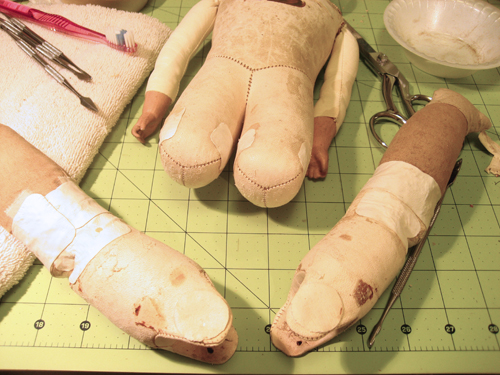
I’d never restabbed a hip joint before. I was in for quite a little learning experience…
Repairing an Antique Doll part 5
There was one tear in the fabric which I covered with a patch of old muslin. In order to keep the loss of sawdust to a minimum, I wrapped a piece of masking tape around her leg after removing all of the prior doctor’s leather. The work that’d been done was so horribly sloppy and leaky, it was really sad and surprising that the doll hadn’t lost even more sawdust. I picked the least shredded knee joint and began my patching there by making a rectangle and then splitting it for where the gusset opens up.
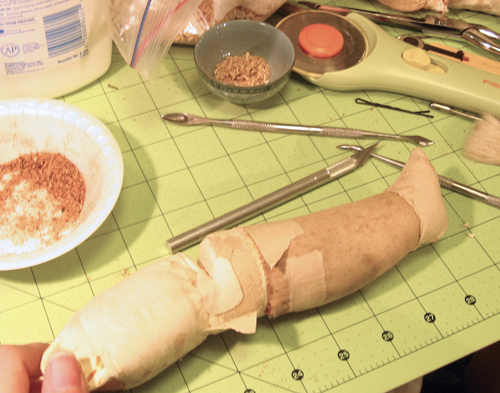
Then I did the same to the other side.
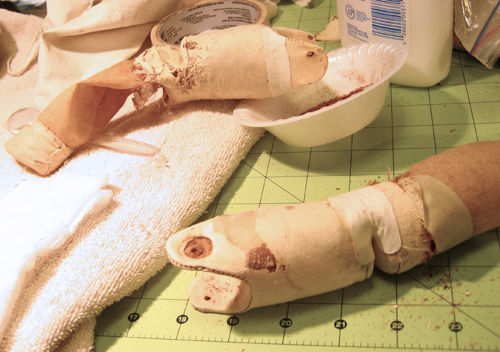
And promptly took a break from working on that leg. That way my work stays fresh and I don’t get quite as frustrated. (I switch gears a lot while I work. It seems like I’m scatter-brained–and maybe I am!–but it allows me to keep working even when the going gets tougher and tougher.)
The other side had a gaping hole so I got out my old spool of white thread. It’s not really white anymore, but that’s what makes it perfect because the doll’s body is aged as well. I did my best to gather up what leather was still there. I think I was the third seamstress to have worked on the knee, too.
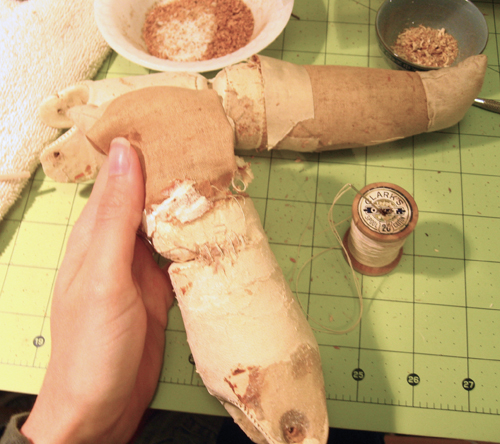
Just like the other leg, I patched this one up, too…
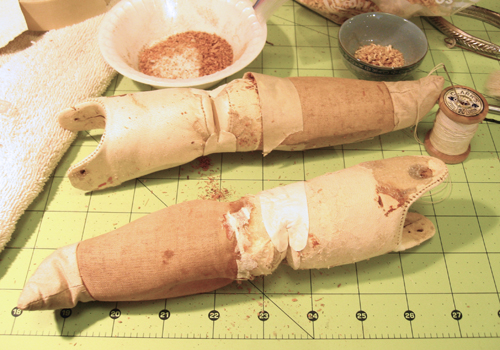
…And then set it aside because I just didn’t think I had it in me to start stuffing the whole thing with sawdust yet. I’ve stuffed arms before, but never a whole leg. I didn’t really know what I was in for and didn’t want to find out yet, either. Again, I gave myself a break and worked on the other leg.
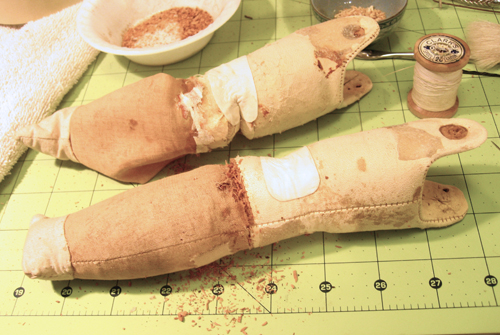
It was pretty straight forward except that I’d need a very long piece of leather so that I could wrap it all the way around. The catch was that I couldn’t stuff the leg, wrap it and be done. I had to do it in stages so that I could give the leg the right firmness with packed sawdust. The tear went almost all the way around.
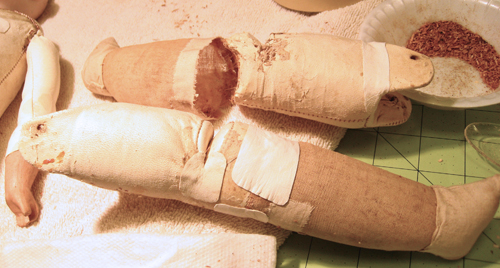
With a lot of patience, I got the leg all fixed up and read to be reinstalled. The other leg…well…I’ll tackle that in my next post.
Repairing an Antique Doll part 4
Having completed the doll’s torso, it was time to work on the legs. Since the leather patches on her hips were already starting to lift, I peeled them all the way off…
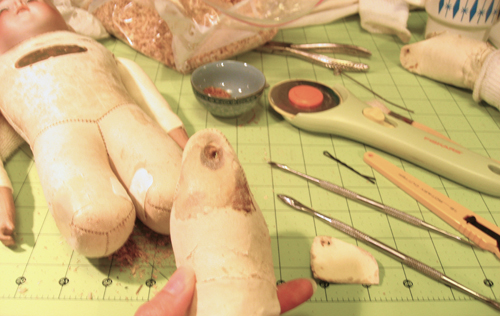
And couldn’t figure out why they’d been put on in the first place. They were huge and appeared to only be for the section around the metal buttons on the ends of the hip wire. Yeah, there was damage, but only in the shape of the circle under the button and had worn through the patches, too.
Ironically, on the inside of one of the legs, the leather had a tear which would’ve been prevented had the person who’d done the outside also done the inside.
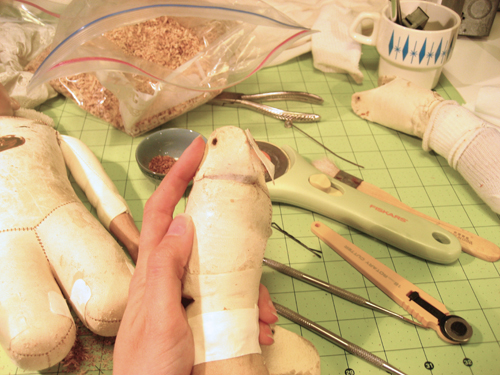
As I inspected it, I squeezed the leg. It was lighter than the other one and didn’t feel right. Grrr… the whole thing had been stuffed with polyester fiberfill!!!!!
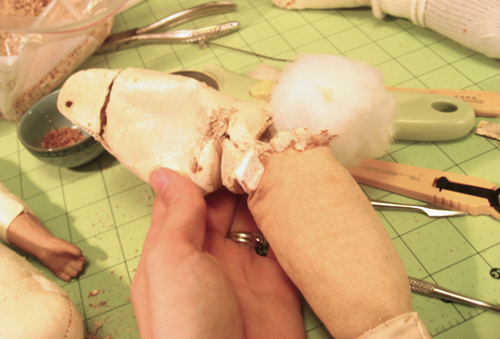
Well, the whole thing except the foot.
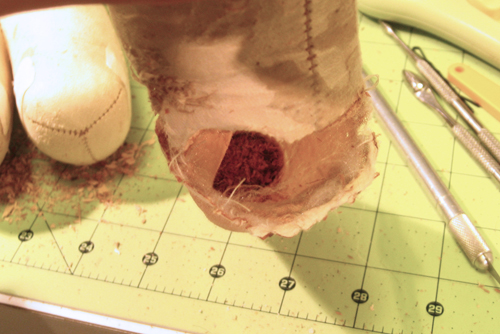
I pulled out all the fiberfill and threw it away so I wouldn’t have to look at it. Then, I set about repairing the upper tear. It was the easiest of all the leg damage so I got that out of the way.
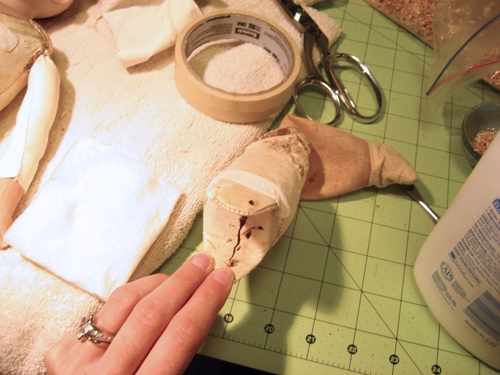
And while I was at it, I noticed another tear on her torso so I took care of that one as well.
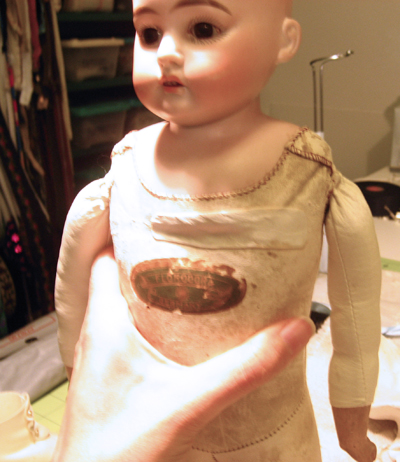
Okay, so I was actually procrastinating. I was actually dreading the knee repairs. I did absolutely everything else I could do before I embarked upon all the work to be done to those legs. One needed to be completely restuffed with sawdust. They both were shredded at the knee and just below where the fabric met the leather. Those legs were a wreck, but they weren’t beyond repair.
Repairing an Antique Doll part 3
To fix the hips, I stuffed more sawdust in…until it was fully packed and would hold no more. Also, I started on the inside where the holes were smaller.
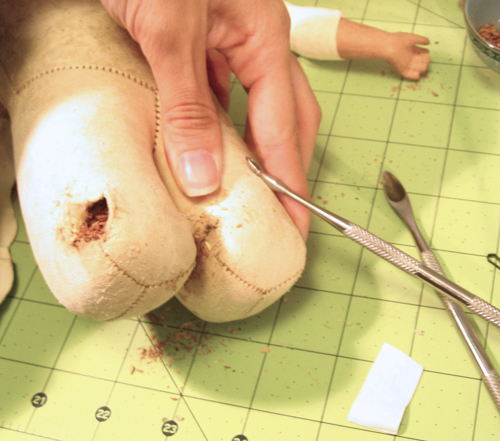
Using an old ruined pair of kid leather gloves, I cut off a rectangle and then rounded the corners so that they wouldn’t catch on anything.
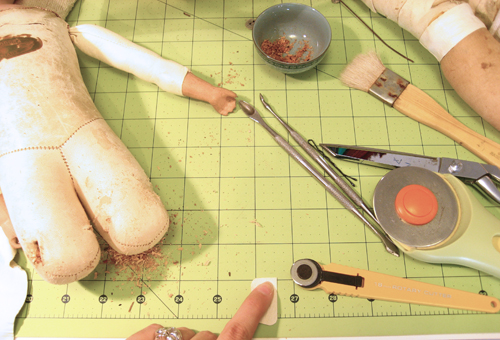
Using white glue, I smeared the whole back side of the patch and then applied it to the doll.
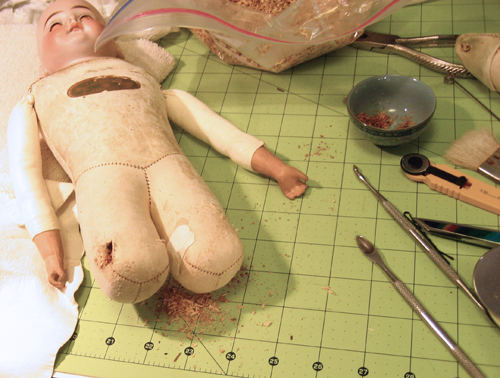
And did the same for the outside…although that took a lot longer. So much so that I took a few breaks because I was getting horribly impatient.
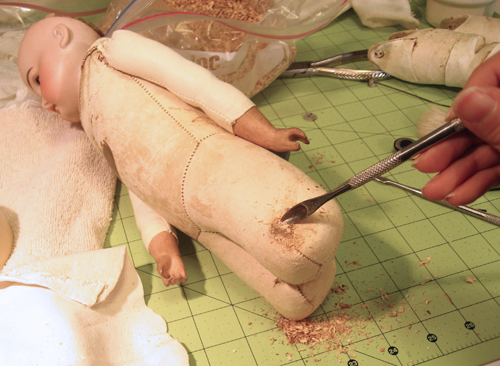
Sure, stuffing sawdust is easy, but back in the day, these dolls were packed so tight they were solid. If I’m going to repair a doll, I have to follow that same standard. That’s what she deserves. So I stuffed and stuffed and stuffed and stuffed and packed and stuffed until her hips were packed and then I patched them up.
Repairing an Antique Doll part 2
For the record, I’m not a doll doctor. Not at all. I’ve never watched someone else repair a doll. I’ve never even asked someone about doing it. I’ve read a couple of books on the subject, but that’s it. Everything I know about doll repair is from what I’ve done and what I’ve seen on the dolls as they come into my collection. I could be totally off my rocker on how I work on them, but I care immensely. I once overheard an old school mechanic tell a young man that “What you lack in experience, you make up for in caring.” I like to think that rings true here, too.
I’ve blogged some of my doll repair work previously, too. Click here to read about the celluloid doll I fixed.
All right, continuing on my AM 1897…
I wasn’t offended by the double-stick tape under the wig. I don’t use it, but that’s just because my dolls don’t get moved around and their hair stays on just fine without the need for anything sticky to keep it there. The only thing that bothers me about double-stick tape is that it does dry out and become ineffective. This stuff was still super-gooey, though.
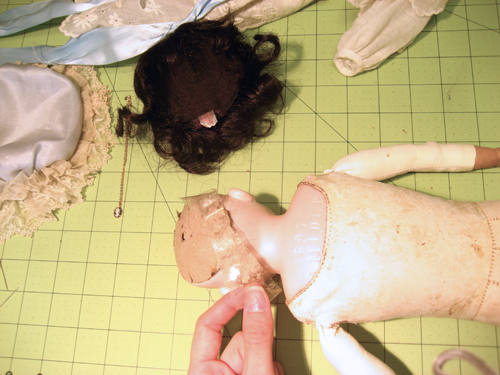
However, I am offended by synthetic wigs on antique dolls. When I get a chance, I’ll swap this doll’s synthetic wig for either a human hair one or perhaps one made from mohair. I’m leaning more toward human hair because that’ll look the closest to how the doll came into my collection and still be correct for the time period.
Okay, here I am looking at the task at hand. Both legs need work below the knee. The leather on one side was marginal.
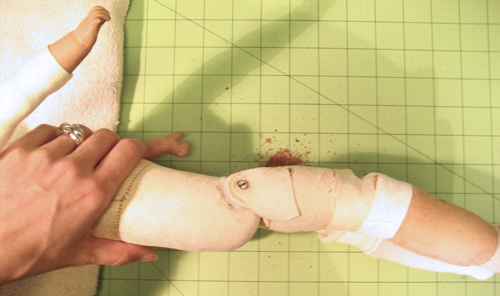
The leather on the other side…well…it was very loose under the sock.
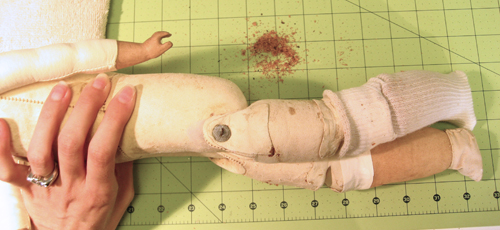
Okay, time to dig in for real. Since I needed to work on the hips and the legs themselves, I figured the best thing to do would be to remove the legs first. I straightened the end of the wire (which went through the right kind of metal buttons at each hip, but they were mismatched in size) and removed it.
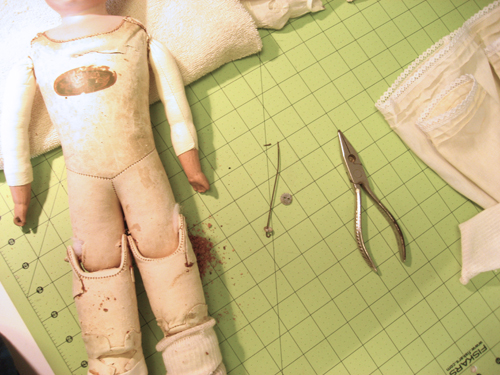
Only to discover that the hip damage on the torso was even worse than I’d thought. That hole is huge.
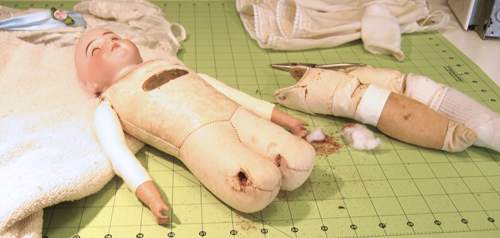
And the hole on the other side is even bigger…and stuffed with polyester fiberfill…grrrrrr…
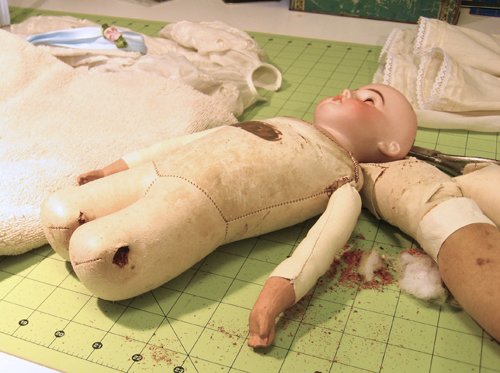
Time to get out the bag of sawdust I keep handy… and the old kid leather gloves to use as patching.
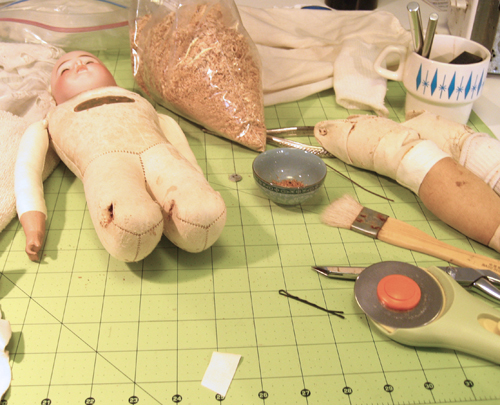
In my next post, I’ll detail how I did the hip repair.
Repairing an Antique Doll part 1
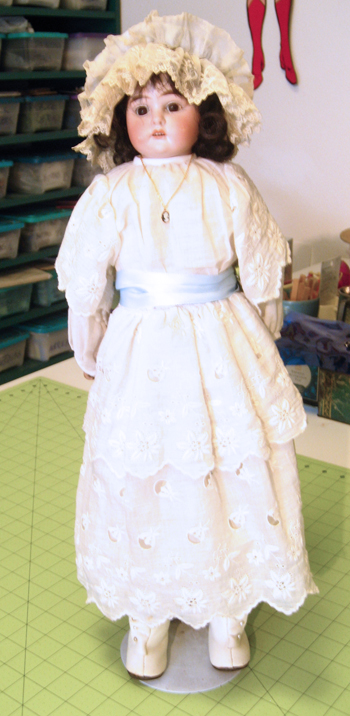
Meet my AM 1897. She was made some time around 1897, but not necessarily that year, by Armand Marseille, a German doll maker…probably the most popular doll maker. Sure, she displays well:

However, under that white dress, she’s falling apart. I’ve been in denial for about a decade now. This doll came into my possession in 1999 or so. I’d put her on layaway at an online doll seller, made a few payments and forgot about her. About eight months later, the shop sent me a beautiful doll greeting card reminding me about her. Whoops! Anyway, I’ve displayed her for all these years, but I knew I’d have to get down to business and see what was really wrong with her hips. She’d been leaking a little sawdust when I first got her, but that was back when I was still afraid to dive in and do repairs.
These days, well, to prevent the damage from getting worse, I took her into my craft room:
I removed her clothing so that I could get the real story…well, almost all of her clothing. When I got to the sock, I had to stop because a bunch more sawdust spilled out.
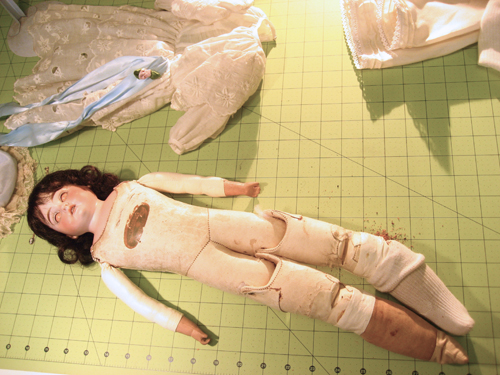
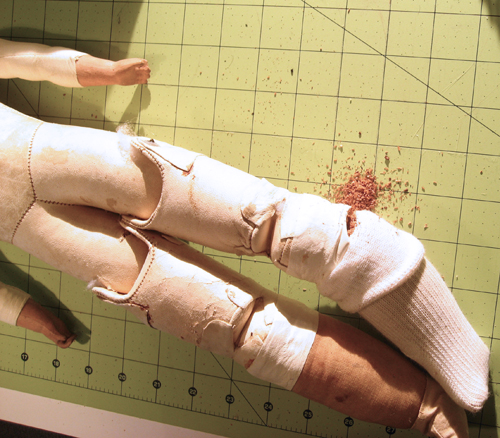
While the rest of her clothes were off, I inspected the earlier repairs that had been done. They really seemed to have been done real quick just to resell the doll or something. Yeah, some of the holes were covered up, but not very well…or at least not with a whole lot of care, I guess. I don’t know how else to describe the job that was done.
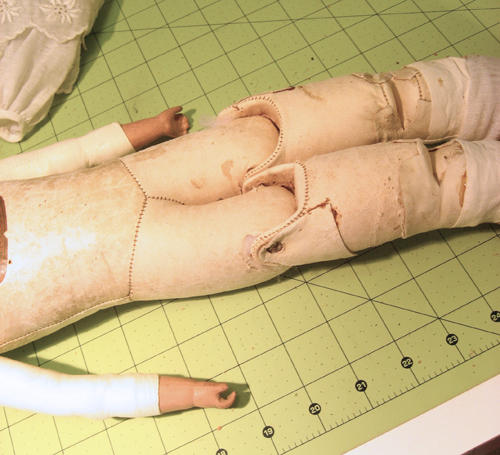
I was optimistic about the hip joints after seeing the large patches. Sadly, the outside of the hips didn’t really need patching. The inside, on the doll torso, was where the problems were and those weren’t worked on except to stuff some polyester fiberfill in there and hope for the best. I was not thrilled.
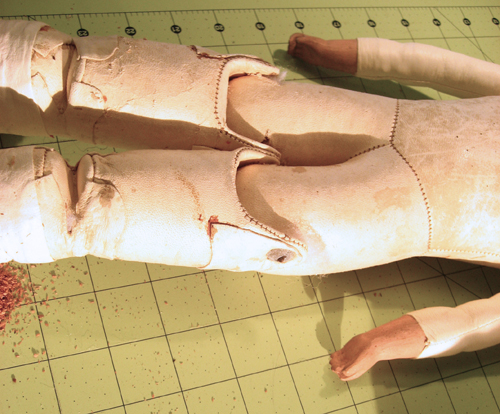
To me, repairs should be reversible for one thing. They should also use period correct materials. In other words, polyester fiberfill does not belong anywhere near antique dolls. Old rags, sawdust, sure, but not fiberfill. It just doesn’t belong. That was another clue that whoever did the repairs was just trying to get the doll out the door. The person didn’t really care what the doll was supposed to be stuffed with. At least the last doctor had used kid leather to cover the holes…I just really wish she’d done a neater job. There were two kinds of glue and the only areas that were covered were the unnecessary hip joint pieces. The other glued pieces were very sloppy. That’s why the leg was leaking so badly.
Goofing off with a doll picture
While working on a different project, I got inspired to mess with one of my doll pictures. I’d taken the photograph as part of a “before” picture because underneath her dress, she’s got some very serious problems that need to be fixed. I guess it’s because the girl’s so cute or maybe because the picture was just there when I needed it. I don’t know, but I like to think I made something sweet out of it.

When I’m further along on the project, I’ll post the real “before” images as well as progress on fixing all the torn leather. A previous owner had put cotton balls instead of sawdust in her kid body and just the thought of that irritates me. Old rags from 1900, okay maybe, but not cotton balls. That’s just plain wrong. In my opinion, antique dolls need to have either antique repairs or period-appropriate repairs if they must be modern.


