My Shoe Chronicles — Gold Holographic Heels
I call these my disco shoes even though they’re painful to really dance in. I dunno, something about the fact they’re gold and holographic just makes them fun to wear out for fun.
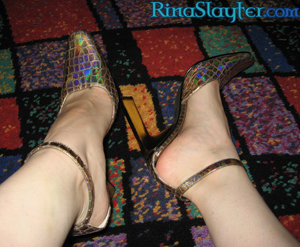
They’re a little too high and a little too small, but they do peg my weird-o-meter pretty well. I definitely don’t wear them much, but when I do, it’s always memorable… Last time, I got some pretty wicked blisters, but strangely, when I wore other shoes, the blisters weren’t irritated. That’s like both having and not having blisters all at the same time. I suppose I’m a glutton for punishment, but the experience was worth it to me.
Fixing My Brown Fuzzy Monster Coat
Meet my brown fuzzy monster coat:
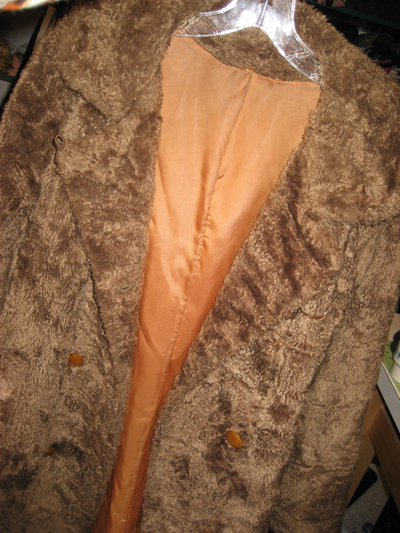
Not to be confused with my dark brown one, my red one, my gold one or either of my light blue ones. I got this coat from a thrift store and didn’t notice that one of the sleeves had blown out in back until I went to wear it one chilly night and slid my arm right through the lining and everything. Whoops!
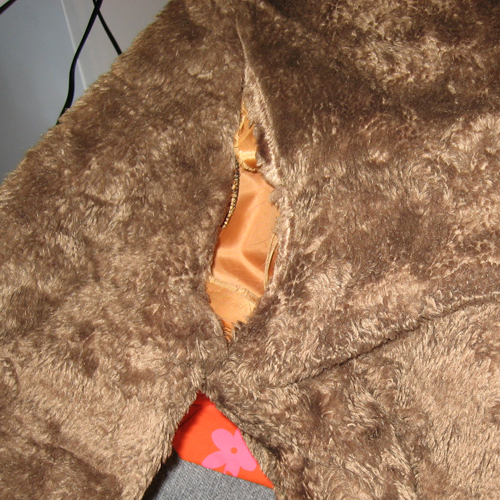
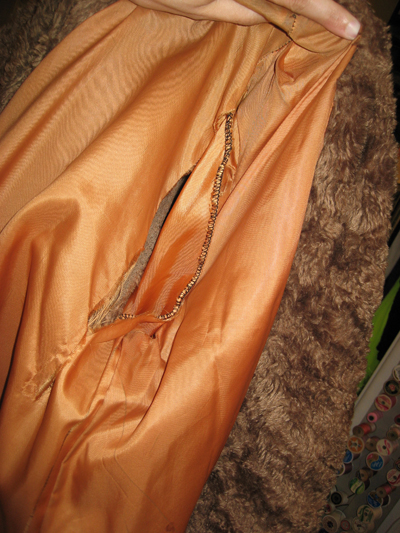
It’s understandable. The coat is likely from the 60s or 70s. It’s definitely vintage and has seen a lot of wear. That’s why I like it and most of my others. They’re so worn, they really look like fuzzy monsters or well-loved teddy bears. Kind of matted, but so very comfy and warm.
Anyway, I’ve never sewn fur before (fake or real), so this was a bit of an experiment for me. Rather than be afraid, I just pretended it was like any other fabric and started pinning, starting with the side. Only the seams had busted. The fabric was still intact.
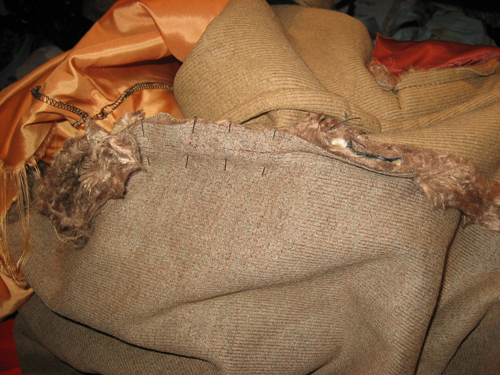
I stitched it back together and then pinned the sleeve:
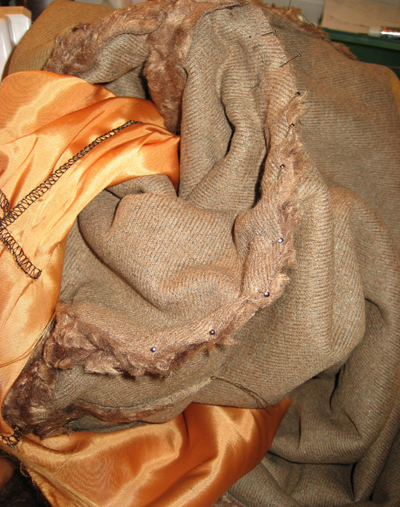
Sewing it back together was a little tricky, but I made it happen. Plus, it’s fuzzy fur, so it’s quite forgiving as far as showing repairs.
I really wasn’t sure what to do about the lining since it was frayed. There are a few iron-on patches in other spots, but while I do have patches I could use, in a way, I wanted to do this in such a way that when it frays again, I’ll be forced to replace it entirely. There’s a lot of wear on the inside, but the outside still retains its fun.
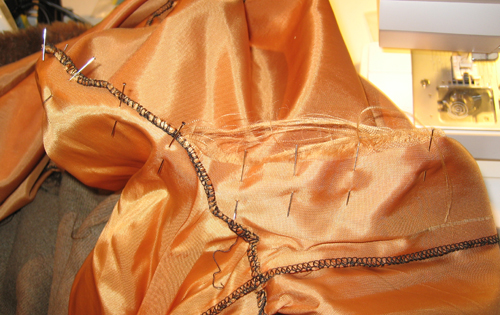
So, once the lining was stitched up, too, it was time for the moment of truth:
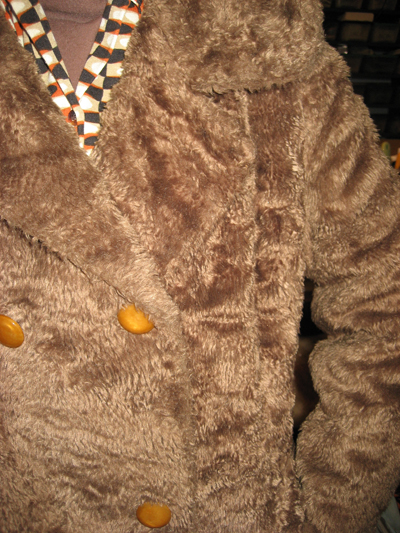
Hooray! Some day I’ll replace the buttons. The plastic is getting cracked and crazed. You can’t tell from far enough away, but up close, those buttons really need to be swapped out. And it’s not like I don’t have a billion buttons waiting for the ‘perfect’ garment to come along when I’ll finally break down and install them.
My Shoe Chronicles — Vintage Gold Buckles
Not much of a story for these. They’re gold. They sparkle. They’re vintage. They’re perfect.
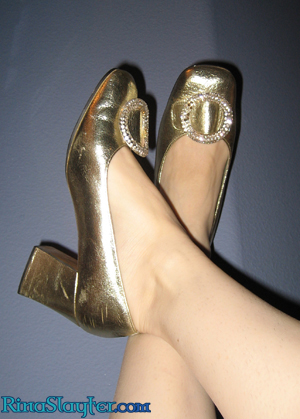
I picked them up at a thrift store and some of the rhinestones had fallen out of the buckles. One day while I was downtown in the garment district, I happened to remember that I needed some pointed-back stones. I had the clerk pull out a few sizes and then just guessed which ones would work.
I’m still amazed that I somehow guessed correctly when I hadn’t actually looked at the shoes for months before I bought the stones.
I Can’t Help It
Whenever I look out my back window, I just have to see where my tortoise is, what he’s up to. Sometimes, he gets himself flipped over and can’t get back upright again because he’s got a flat spot on his shell, so it’s good I’m looking out for him just in case.
And then there are days when I look out, expecting him to be frolicking in the grass or ground cover, but he’s not.
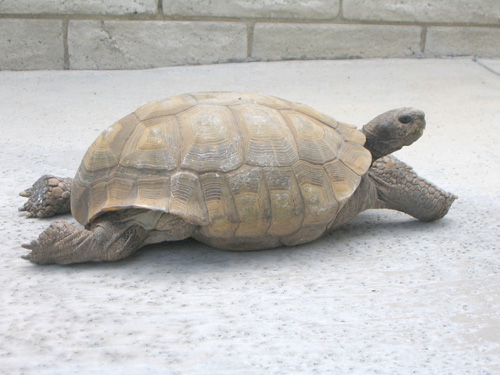
I should caption this “Don’t hate me because I’m beautiful!”
How To Make A Ribbon Choker Necklace — Part 3
UPDATE: For a better tutorial, visit ribbonchoker.com.
The ribbon choker necklace is almost done. I’ve laid out everything needed in order to finish it. The ribbon with clamps installed, the jump rings, clasp and extension chain.

Step five: ADDING THE FINDINGS AND FINISHING!
Open a jump ring.
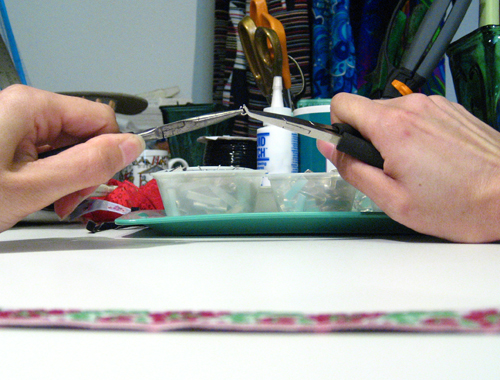
Put the clasp on it and close it.
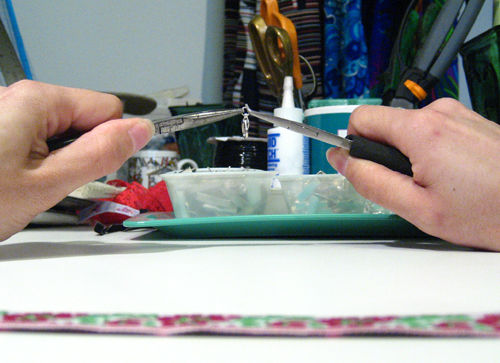
I put this extra jump ring onto the clasp so that it will lay right when it’s attached to the ribbon clamp and allow a little extra room for your thumb to work the clasp when you wear the necklace.
Open another jump ring and this time join the ribbon clamp to the jump ring on the clasp and close it.
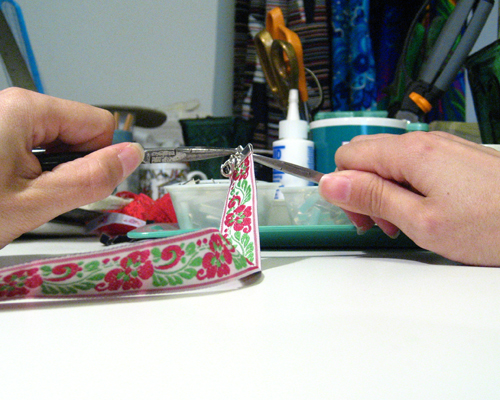
Finally, open the last jump ring and join the extension chain to the other ribbon clamp.
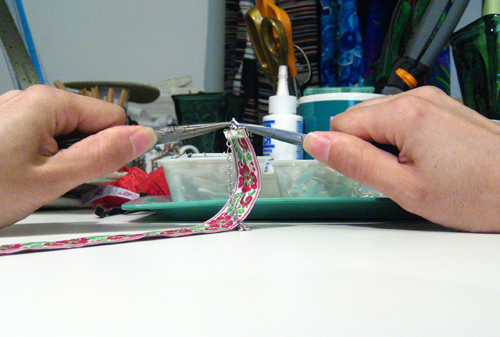
There you have it! A beautiful ribbon choker necklace!

This one doesn’t exactly match what I happened to be wearing that day, but oh well. I had fun making it!

To see more of my work, visit my Etsy Store and my Artfire Store. If you mention my ribbon choker how-to blog series during checkout of any purchase from my shop, I’ll include a free ribbon choker necklace.
My Shoe Chronicles — Flower Boots
I saw these in the little boys department and saved a fortune on a great pair of boots. Who says only kids can have fun boots?
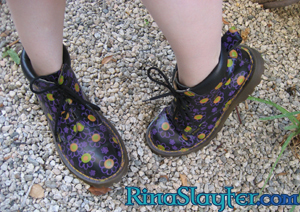
Yeah, little boys section. Had they been in the adult section, they probably would’ve been twice the price. They’re Doc Martens, too. I got them about 12 years ago now and they’re finally broken in. Docs always take awhile to wear in, but when they do, they’re some of the most comfortable boots on the planet.
And most durable, too. Well, the ones made in England at least. My husband got a pair of Docs that were made in China and they fell apart within a few months of hard wearing.
Over the years, I’ve collected eight pairs (2 pairs of shoes, 6 pairs of boots) from thrift stores and two pairs that were purchased new. Look for “Made in England”. They’ll last a lifetime.
My First Big Show
I’m not saying that my booth was big, but that there were a lot of booths and people cruising around at the Rose Bowl Flea market. I enlisted the help of a couple of my friends and they got to take in the flea market for the day because I was totally able to hold down the fort solo.
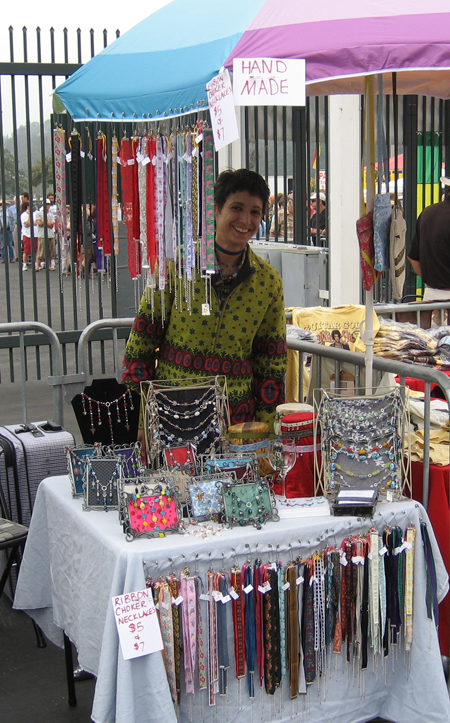
This is like a new chapter in my life. I’ve gone to many flea markets and craft fairs, but I’d never had a booth at one. And, well, here I am.
And I don’t think I can get enough. It’s lots of fun to meet people, too, so look for me doing many more of these shows in the future. I cart all of my handmade inventory out to these things, so if there’s something you’ve seen in my shop at ArtFire or Etsy, and want to see in person, come see me at a show if you’re in the LA area. I’ll announce which shows I’m doing when, of course, so please check back or subscribe to my RSS feed.
I also bring new stuff to the shows that hasn’t been posted to either of my shops yet. (I figure that if I sell it at a show, then I need not photograph it, etc.!) At the Rose Bowl, I had several new Rina necklaces, ribbon chokers without beads and new embroidered ones, too.
How To Make A Ribbon Choker Necklace — Part 2
UPDATE: For a better tutorial, visit ribbonchoker.com.
This is where it all starts to come together. Remember, there are plenty of other ways to make a ribbon choker necklace, I’m only presenting the way I do it.
Step three: MEASURE AND CUT!
There are a few ways to figure out the length of ribbon you’ll need. It’s always a good idea to measure the neck you’re about to make the necklace for just so you’ll have a number to reference later.
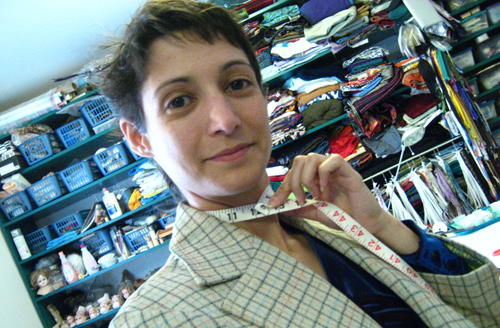
Yes, I have a very small neck.
Using a measuring tape is easiest. If you don’t have a measuring tape, you can also run a string, ribbon, shoelace, whatever around the neck, pinch your fingers over the spot where the end meets the rest and then measure that length with a ruler.
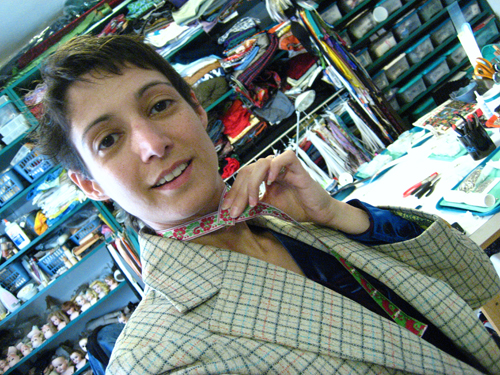
No matter which method you use, subtract a little more than an inch. If you’re not using an extension chain, you might want to subtract only 3/4 of an inch. I like to subtract at least an inch. That way I’ve got more room to adjust not only how tight the necklace is, but where it’ll land on my neck. I can wear it tighter which’ll make it sit higher or looser which will make it lower on my neck.
Sometimes the wider ribbons will need to be a little shorter because they’ll end up sort of conical around your neck rather than perfectly cylindrical. You’ll definitely want some room for adjustment on those.
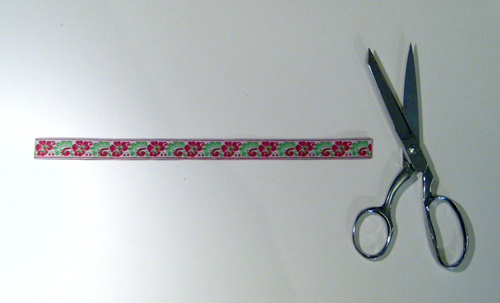
No matter what the length of your ribbon, make your cut perfectly straight across perpendicular to the length of your ribbon. If the ribbon wants to fray, cut the fuzz away, too. You want good, solid ribbon inside the clamp.
There are anti-fray products as well as glue that you can use, but it’s not necessary unless you’re working with a particularly thin and finicky ribbon that would rather fray than cooperate. If that’s the case, the ends will need to be treated or even folded and sewn.
I haven’t needed to take any drastic measures other than a dot of fabric glue to hold down the thread on the back of some of my beaded and/or sequined ribbons. I just don’t want them to unravel and all I do is load the tip of a toothpick with fabric glue, touch it to the thread and push it down to the back of the ribbon at the very edge so that it’ll be completely hidden when the clamp goes on.
Step four: PUTTING IT TOGETHER!
Choose the right clamp to fit your ribbon.
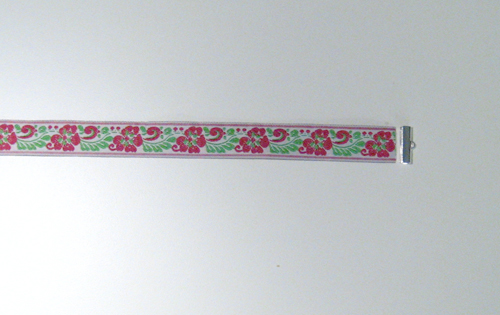
I was lucky in that the clamp and the ribbon match in size. On my wider ribbons, I have to iron the corners down and cut a new edge in order to match the thinner clamps.
Still with me? Now we’re really turning this bit of ribbon into a pretty necklace.
Put the clamp in the pliers. (Sorry about my photography. I did this whole series by myself and sometimes I really needed a third hand to help out. At least it shows that you don’t need much room in order to put these together.)
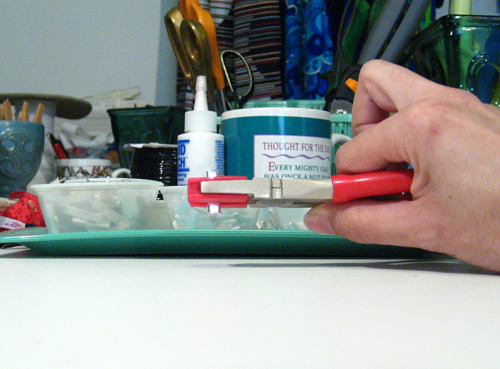
Now for the fun part. I’ve got the clamp in my pliers, ready to compress. I add the ribbon with my other hand, holding it between my thumb and forefinger to keep it centered in the clamp. My other fingers are pushing it into the clamp.
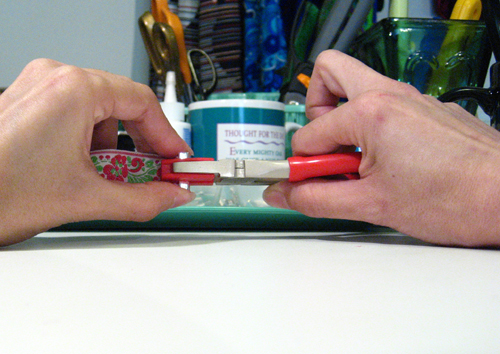
Now smash the clamp closed. I usually get my thumb and forefinger a little stuck. There’s a knack to not hurting them and even after as many as I’ve made, I still get pinched now and then!
It won’t be closed all the way just by compressing it in the middle. Keep your fingers in place, holding the ribbon or it’ll slide out or go crooked and that won’t look very nice. Move the pliers to the top and squeeze. Then move them to the bottom and squeeze.
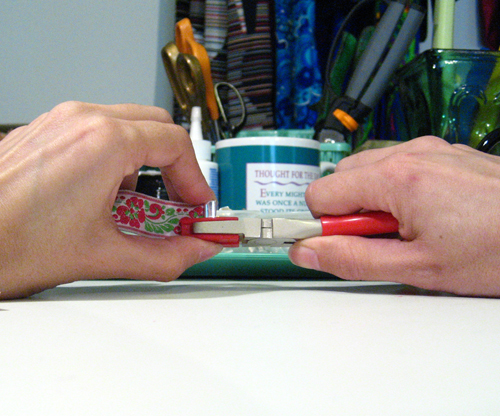
For good measure, I like to give two more squeezes along the length of the whole clamp. One on each side just for good measure.
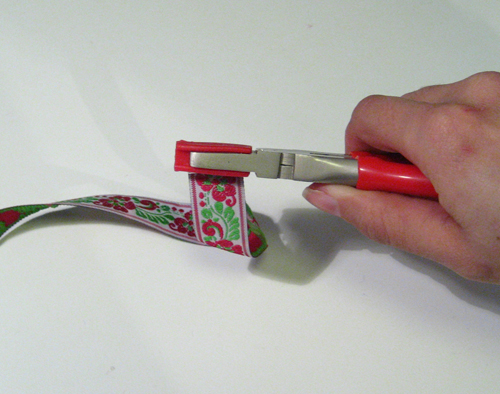
From here, all that’s left is putting on the findings…which I’ll show you how to do next time.
To see more of my work, visit my Etsy Store and my Artfire Store. If you mention my ribbon choker how-to blog series during checkout of any purchase from my shop, I’ll include a free ribbon choker necklace.
My Shoe Chronicles — Aqua Dots
I love these shoes because they’re funky. I saw them and had to have them. They’ve even got stars and chains on them.
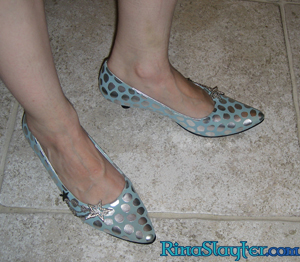
Another of the few pairs I bought new. They’re sort of nostalgic for the 80s and go with one of my favorite skirts. Oddly, I’d painted silver diamonds on the skirt to hide a few stains. The next week, I went to my favorite shoe store in Chinatown, and there these were on an end cap.
Yeah, as soon as I saw them, I knew they were leaving with me. My husband just rolled his eyes. He knew it to. In fact, he saw them before I did and then scolded himself for pointing them out to me. He’ll likely never learn not to point out silly shoes to me and I’m so glad!
My Dinosaur
My husband and I always joke that we have a moving boulder in our yard. It seems to crop up in all sorts of different places. This morning, there were two boulders where I only remember having one…
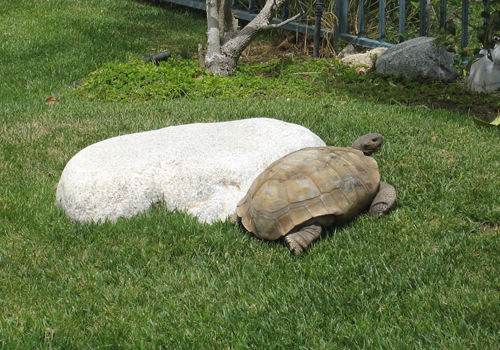
It is so totally Friday and I’m so totally glad for it. Not that my weekend will be laid back in comparison to the week I’ve had, but there’s just something special about Fridays for me.
In celebration, I’m going to go make a bunch more necklaces. Or maybe frolic with my walking boulder…aka Toad. (Yes, my tortoise is named Toad. Thankfully, he’s not smart enough to be confused by it.)


